
Access the new E-commerce developers portal at docs.cielo.com.br.
Warning: The content on this page is being discontinued and will not receive updates after 09/04/2024. Please visit the new documentation at docs.cielo.br.
This manual will guide the developer in integrating with the Checkout Cielo API. By integrating the Checkout API, you will be able to:
Not a developer? You can use Checkout via the Cielo website or the Cielo Gestão app. Find out more in this tutorial.
Checkout Cielo is recommended for websites with shopping carts, that is, when the consumer browses the website and chooses one or more products to purchase. When finalizing the purchase, the consumer is redirected to a secure Cielo online payment page.
Checkout Cielo is a solution that brings together several payment processing services and generates a payments page that provides a high level of trust, following PCI security standards.
The great advantage of Checkout Cielo is the range of services aggregated in a secure transactional screen with only one technical integration via the API REST.
Checkout has the following features:
| Feature | Description |
|---|---|
| Payment page | Checkout Cielo has its own transactional screen, with an optimized layout, shortening the steps to pay for your transactions. |
| Recurrence | Cielo Checkout has Scheduled Recurrence. All the store needs to do is define that a transaction must be repeated, and Checkout will execute it again at the defined interval. |
| Fraud analysis | Checkout provides fraud analysis of credit transactions without additional integration. |
| Various payment methods | Checkout Cielo has a wide range of payment methods: Credit cards Debit card Boleto Bradesco and Banco do Brasil Pix Cielo, Bradesco and Banco do Brasil |
| Integration with Button and QR Code | Without technical integration or programming, Checkout provides an integration that makes it possible to create a button to access the transactional screen. See more at Checkout Tutorial |
| Transactional reports | Within the Cielo website, you can generate transactional reports that facilitate the administration of your sales: Recurrence Report Shoppers Report Sales Statement Sales Report |
| BIN Query | BIN Query is a card data search service, whether credit or debit, which identifies the characteristics of the card based on the first digits: brand, type, nationality, whether it is a corporate card, issuer and whether it is a pre-paid card. |
The current version of Checkout Cielo supports the following payment methods and card brands:
| PAYMENT METHOD | BRANDS AND PROVIDERS |
|---|---|
| Credit card | Visa, Mastercard, American Express, Elo, Diners Club, Discover, JCB and Hipercard |
| Debit card | Visa, Mastercard and Elo |
| Pix | Cielo, Bradesco and Banco do Brasil |
| Registered boleto | Bradesco and Banco do Brasil |
Note: Checkout Cielo maximum limit of installments is 12 installments.
Checkout Cielo has a list of basic requirements for the integration process to be successful. Here are the points that must be ready before integration:
In the API Checkout Cielo, the merchant sends a request to create the checkout screen and the API returns a URL to access the checkout page, called CheckoutUrl.
Check out more details about how the API works in the following flow:
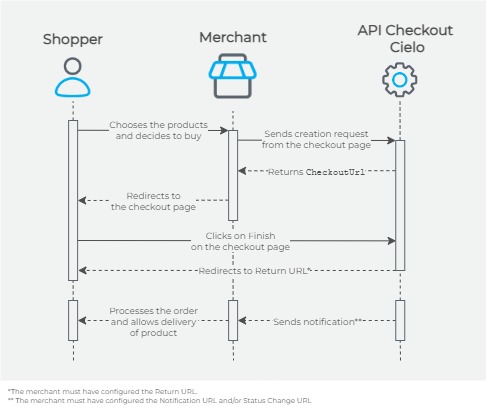
CheckoutUrl, which is the URL of the checkout page created based on the data sent by the merchant (such as shopper, product, delivery data and others);Important: Cielo Checkout does not notify shoppers about the status of their purchase. Cielo Checkout only notifies the merchant when there is a change in the payment status, thus allowing the merchant to decide when and how to inform its shopper about the delivery time and shipping process. To receive notifications, you must configure at least one type of notification URL in Merchant Settings.
The endpoints for integration with Cielo Checkout are presented in the following table:
| API | URL | DESCRIPTION |
|---|---|---|
| API Checkout Cielo | https://cieloecommerce.cielo.com.br/api/public/v1/orders/ | Creation of the checkout page. |
| Cielo OAUTH2 Server | https://cieloecommerce.cielo.com.br/api/public/v2/token | Authentication for querying, capturing and canceling transactions (creating access_token). |
| Transactional Control API | https://cieloecommerce.cielo.com.br/api/public/v2/ | Querying, capturing and canceling transactions. |
Important: The Checkout API does not have a sandbox, but you can create test checkout pages by activating Test Mode on the Cielo website.
Cielo OAUTH is an authentication process for Cielo APIs related to e-commerce. Cielo OAUTH uses the OAUTH2 protocol for security. In it, it is necessary to first obtain an access token using your credentials and then send it to the Transactional Control API.
Authentication is only required for query, capture and cancellation operations.
To use Cielo OAUTH, the following credentials are required:
| PROPERTY | DESCRIPTION | TYPE |
|---|---|---|
ClientId |
Key identifier provided by CIELO | GUID |
ClientSecret |
Key that validates the ClientID. Provided by Cielo along with ClientID |
string |
To generate the
ClientIDandClientSecret, see the Obtaining Credentials topic, below.
To obtain the ClientId and ClientSecret credentials, follow the steps below:
To gain access to Cielo services that use Cielo Oauth, you will need to obtain an access token, following the steps below:
ClientId and ClientSecret, **ClientId:ClientSecret**;Example of Concatenation
| Field | Format |
|---|---|
| ClientId | b521b6b2-b9b4-4a30-881d-3b63dece0006 |
| ClientSecret | 08Qkje79NwWRx5BdgNJsIkBuITt5cIVO |
| ClientId:ClientSecret | b521b6b2-b9b4-4a30-881d-3b63dece0006:08Qkje79NwWRx5BdgNJsIkBuITt5cIVO |
| Base64 | YjUyMWI2YjItYjliNC00YTMwLTg4MWQtM2I2M2RlY2UwMDA2OjA4UWtqZTc5TndXUng1QmRnTkpzSWtCdUlUdDVjSVZP |
The request must be sent only in the header.
x-www-form-urlencoded
--header "Authorization: Basic {base64}"
--header "Content-Type: application/x-www-form-urlencoded"
grant_type=client_credentials
The response will return the access_token, which must be used in Transactional Control API requests, for query, capture and cancellation operations.
{
  "access_token":
    "eyJ0eXAiOiJKV1QiLCJhbGciOiJIUzI1NiJ9.eyJjbGllbnRfbmFtZSI6Ik1ldUNoZWNrb3V0IE1hc3RlciBLZXkiLCJjbGllbnRfaWQiOiJjODlmZGasdasdasdmUyLTRlNzctODA2YS02ZDc1Y2QzOTdkYWMiLCJzY29wZXMiOiJ7XCJTY29wZVwiOlwiQ2hlY2tvdXRBcGlcIixcIkNsYWltc1wiOltdfSIsInJvbGUiOiJasdasdasd291dEFwaSIsImlzc47I6Imh0dHBzOi8vYXV0aGhvbasdasdnJhc3BhZy5jb20uYnIiLCJhdWQiOiJVVlF4Y1VBMmNTSjFma1EzSVVFbk9pSTNkbTl0ZmasdsadQjVKVVV1UVdnPSIsImV4cCI6MTQ5Nzk5NjY3NywibmJmIjoxNDk3OTEwMjc3fQ.ozj4xnH9PA3dji-ARPSbI7Nakn9dw5I8w6myBRkF-uA",
  "token_type": "bearer",
  "expires_in": 1199
}
| PROPERTY | DESCRIPTION | TYPE |
|---|---|---|
Access_token |
Used to access API services | string |
Token_type |
It will always be of the bearer type |
text |
Expires_in |
Token validity in seconds. Approximately 20 minutes. | int |
The returned token (
access_token) must be used in every query, capture and cancellation request as an authorization key. Theaccess_tokenhas a validity of 20 minutes (1200 seconds) and it is necessary to generate a new token every time the validity expires.
To start your integration with the API Cielo Checkout, you will need:
*If you have configured the notification URL.
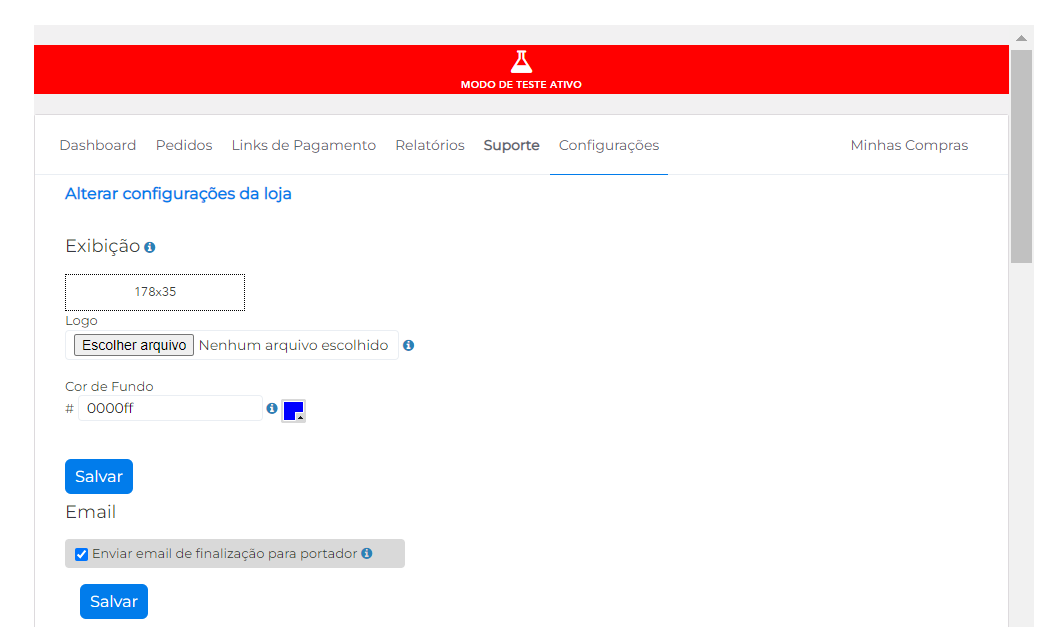
Before setting up, you need to enable Cielo Checkout for your store.
Access store settings on the Cielo website
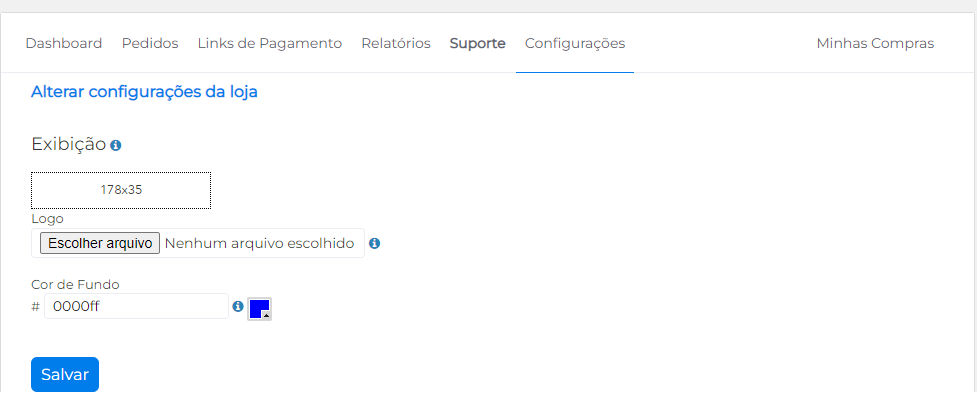
Go to the Cielo website and log in. Access E-commerce > Checkout > Configurações > Configurações da loja.
Insert the image of your store’s logo and choose a background color. Click on Salvar.
If you do not want your end customer to receive an order completion email after payment, disable this option. Then click on Salvar.

Select the payment methods you would like to make available to your customers. For credit cards, choose the maximum number of installments allowed. Then click Salvar.

The number of installments available for payment must be the same as that shown in your Cielo registration. Consult E-commerce Support if you have any questions.
Checkout Cielo allows the use of credit cards from the main national and international brands. This payment method is automatically available with the Cielo affiliation and can initially be used with the Checkout integration.
Credit card transactions will be included in the Cielo Checkout Backoffice as PENDING, AUTHORIZED, PAID, DENIED, EXPIRED OR CHARGEBACK depending on the result of the authorization with the bank. See possible credit card transaction statuses in the Payment_status table.
Credit card transactions need to be captured automatically or manually - it depends on what you choose on step [5. Configure capture and Antifraude].
International Cards: Checkout Cielo accepts cards issued outside Brazil, however these cards do not have the ability to pay in installments. This is a limitation imposed by the issuing bank.
Checkout Cielo allows the use of Mastercard, Visa and Elo debit cards. This payment method is automatically available with the Cielo affiliation and can initially be used with the Checkout integration.
Debit card transactions will be included on the Cielo website as Pago (paid), Não Autorizado (not authorized) or Não Finalizado (not finalized), depending on the result of authorization with the bank. See possible debit card transaction statuses in the Payment_status table.
The Pix payment method is available for CNPJ-type establishments through two providers, Cielo or Bradesco.
To enable Pix Bradesco, contact support.
Enabling Pix on the Cielo website
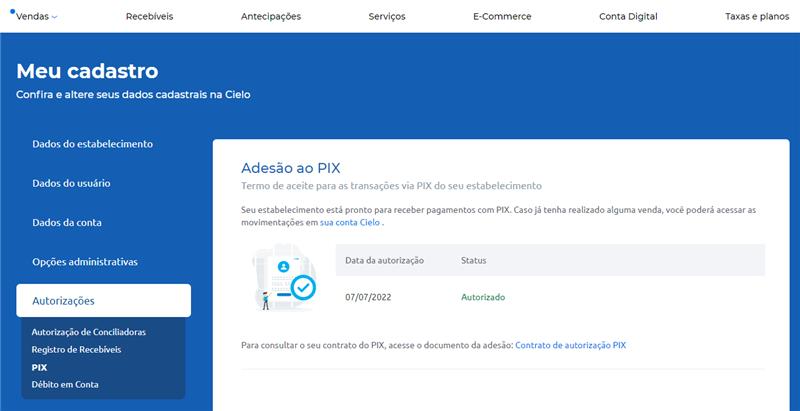
To use Pix, your registration must be enabled with the Pix payment method. To confirm your qualification, access the Cielo portal and click on Meu Cadastro > Autorizações > Pix.
If Pix is not enabled in your registration, the adhesion screen will be displayed if your establishment (EC) is eligible; After completing the Pix adhesion process, it will be possible to use Pix at Cielo Checkout.
See possible Pix transaction statuses in the Payment_status table.
Checkout Cielo allows the use of Boletos from Bradesco and Banco do Brasil. To make boleto available as a payment method, request authorization from E-commerce Support.
The number of installments chosen for payment must be the same as that shown in your Cielo registration. Consult E-commerce support if you have any questions.
Boleto transactions will be included on the Cielo website as Não Finalizado (not finalized) or Pago (paid). Unlike other payment methods, boleto does not have a status update. The store must access the Backoffice Cielo website and modify the boleto status manually.
See possible boleto transaction statuses in the Payment_status table.
The QR Code Pay Cielo allows payment through any digital wallet. When the shopper selects the QR Code Pay on the Checkout Cielo payment page and clicks Finalizar compra (finalize purchase), Checkout presents a QR Code to be scanned by the shopper using the digital wallet of their choice.
See possible QR Code Pau transaction statuses in the Payment_status table.
You will need to fill in the return, notification and status change URLs. URLs must be created and defined by the store. Then click Salvar.

A credit card transaction is sent to Cielo (acquirer) for authorization and will then be subjected to fraud analysis. Then, according to the fraud analysis result, the transaction can be captured automatically or manually.
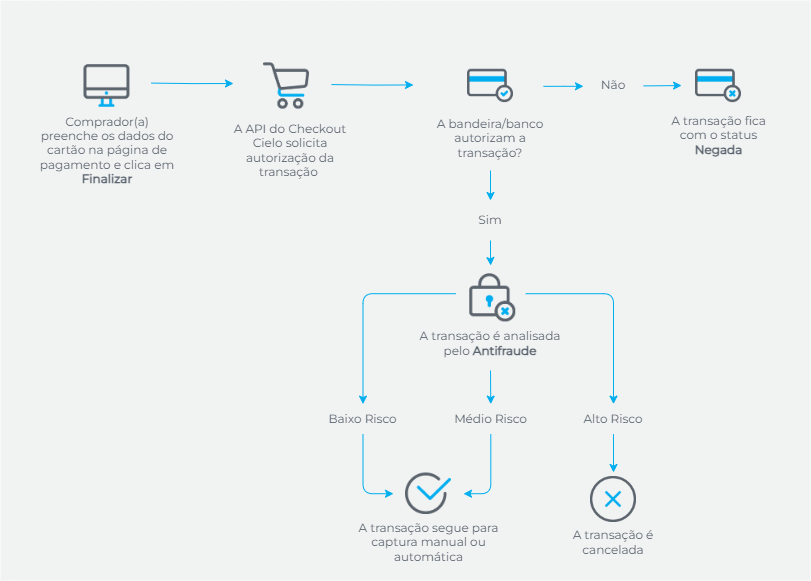
When accessing your store settings, look for the Antifraude and automatic capture section. Select the desired option:
| Capture options | Definition | Description |
|---|---|---|
| Nunca fazer a Captura Automática | Never do Automatic Capture | For every authorized credit card transaction, the store will be required to manually capture the transaction (capture request). |
| Sempre fazer Captura Automática | Always do Automatic Capture | Every authorized low or medium risk credit card transaction will be automatically captured. |
| Somente fazer captura Automática das transações de Baixo Risco no Antifraude | Only automatically capture Low Risk transactions in Antifraude | Every low-risk (authorized) credit card transaction will be captured automatically – medium-risk transactions will wait for manual capture. |
If the fraud analysis classifies the transaction as High Risk, it will be automatically canceled. Manual capture will not be possible.

Authorized credit transactions will be sent for fraud analysis. All transactions classified as high risk will be automatically cancelled, without exception.
| ANTIFRAUDE STATUS | DESCRIPTION |
|---|---|
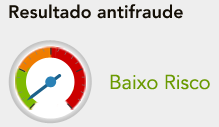
Baixo Risco |
Low risk of being a fraudulent transaction. |
Médio Risco |
Medium risk of being a fraudulent transaction. |
Alto Risco |
High risk of being a fraudulent transaction. |
Não finalizado |
The query could not be finalized. |
On the Cielo website, the analysis will be presented in Detalhes do Pedido:
You can view the Antifraude status by accessing the purchase details, in the Pedidos tab and clicking +.
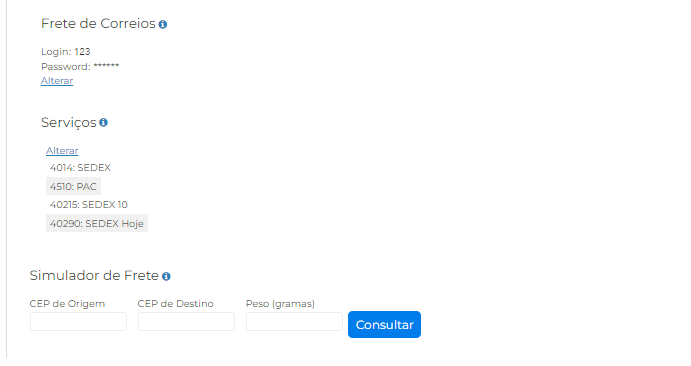
If your store works with the delivery of physical products (those that require shipping) using Correios, enter your Correios login and password and select the desired services, such as Sedex and PAC types.
If your store works with digital materials, services or payments, that is, sales that do not require shipping, skip this step.
It is also possible to use other shipping services contracted by the store. In this case, submit the
Shipping.Servicesnode when creating the payment page. Find out more at Defining shipping.
If you do not fill in the store settings, Checkout will consider the following pattern:
The SSL Certificate for web server offers authenticity and integrity of website data, giving e-commerce customers the guarantee that they are actually accessing the website they want, not a fraudster website.
Specialized companies are responsible for validating the domain and, depending on the type of certificate, they are also responsible for the validation of the entity that owns the domain.


The EV Certificate has been recently released on market and ensures a higher level of security for e-commerce customers.
It is a certificate of greater confidence and when https is accessed the address bar will turn green, giving more reliability for site visitors.
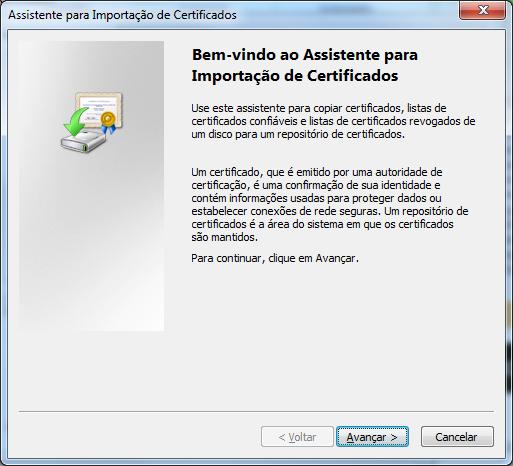
Simply install the following three files into the server’s Trustedstore. Cielo does not offer support for installing the Certificate. If you are not sure how to install the EV Certificate, you should contact your server supplier’s support.
The step-by-step of the EV Certificate installation must done in contact with your server vendor support.
Usually, the browser automatically updates the Certificate. If it does not and the client calls for help, the following steps must be informed:
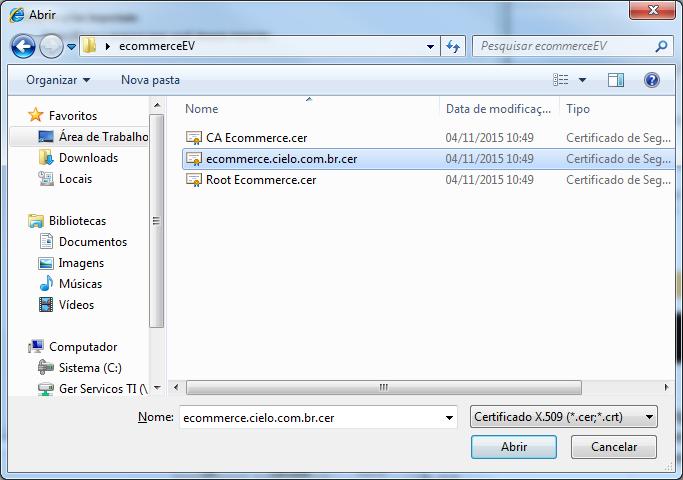
Save the three files below into a new folder, or into a folder that can be easily located, as it will be used later:
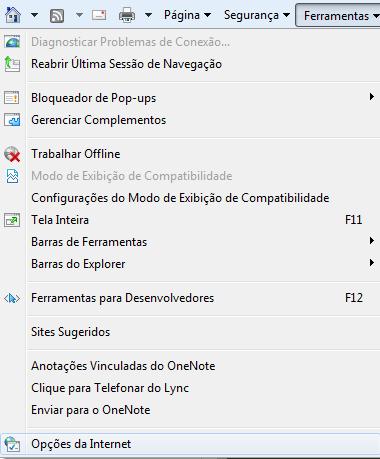
In “Internet Explorer”, click on “Tools” menu and go to “Internet Options”:
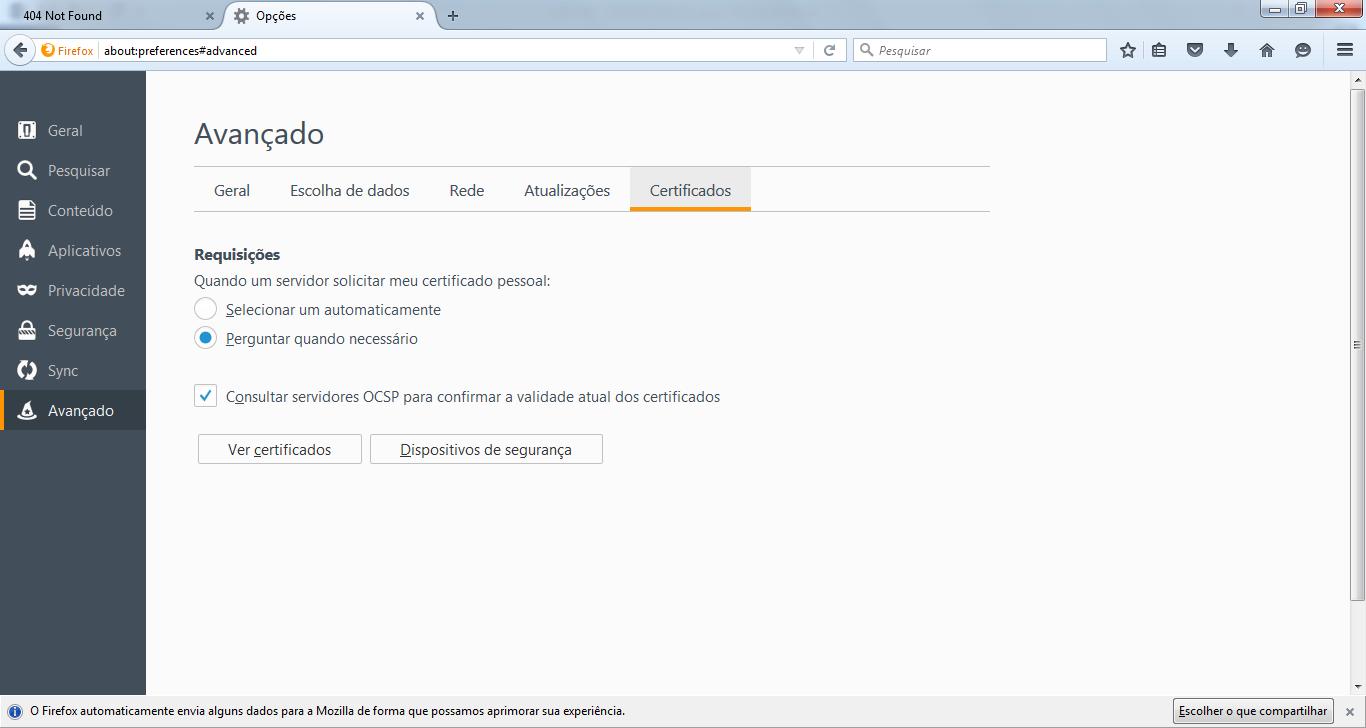
In “Firefox”, click on “Open Menu” menu and go to “Advanced” and “Options”:
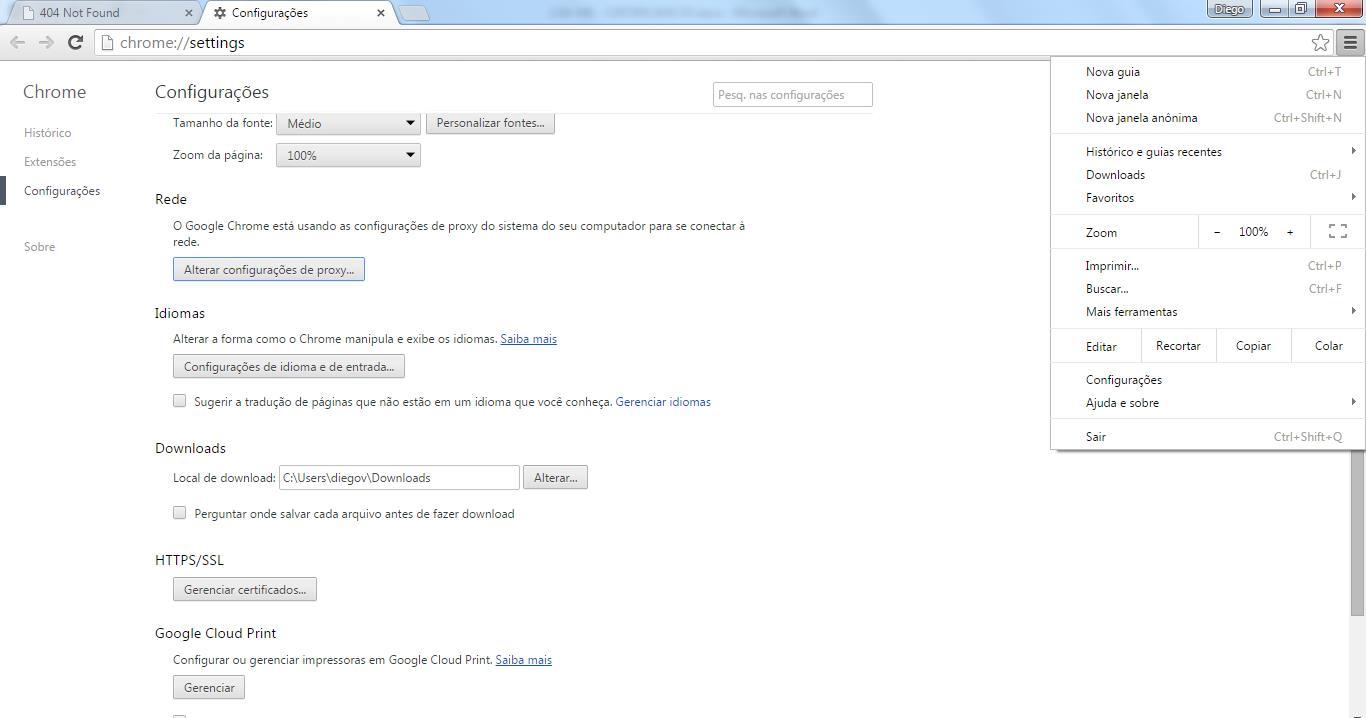
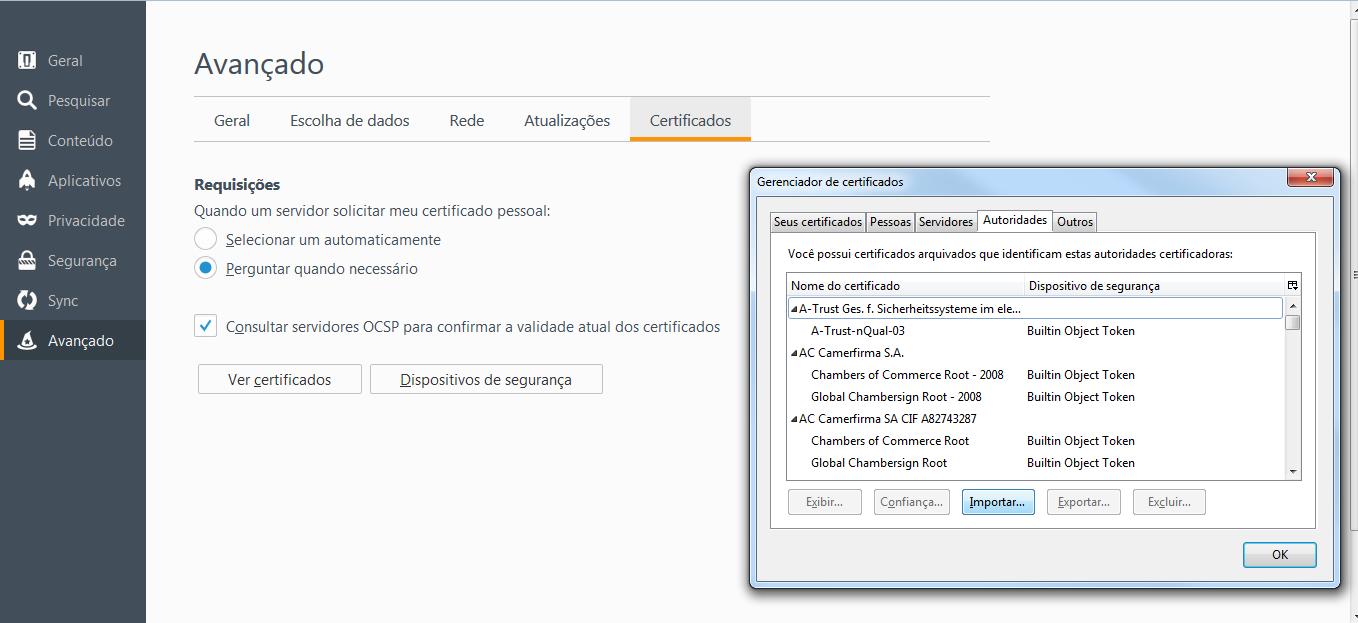
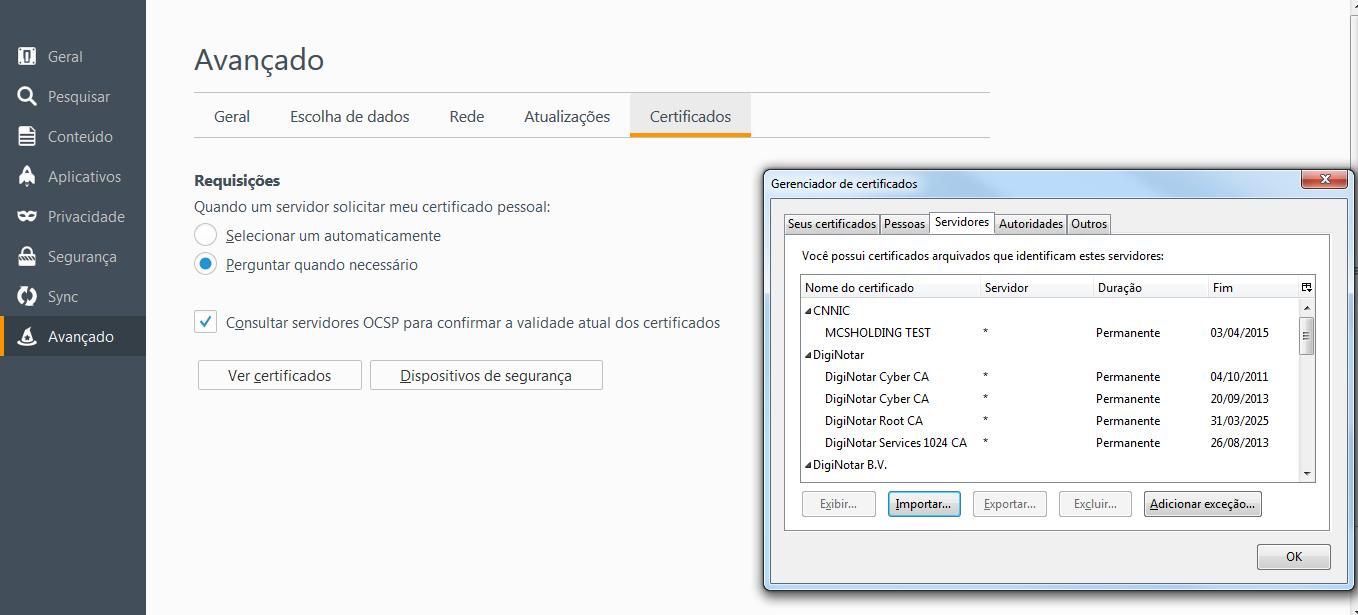
In “Chrome”, click on “Customize and Control Google Chrome” and go to “Settings” and “Show advanced settings … “Change Proxy Settings and “Content” and Certificates:
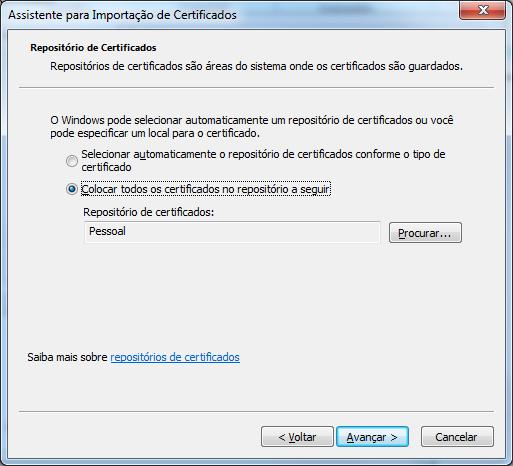
In Internet Explorer, under “Certificates”, click on “Import”.
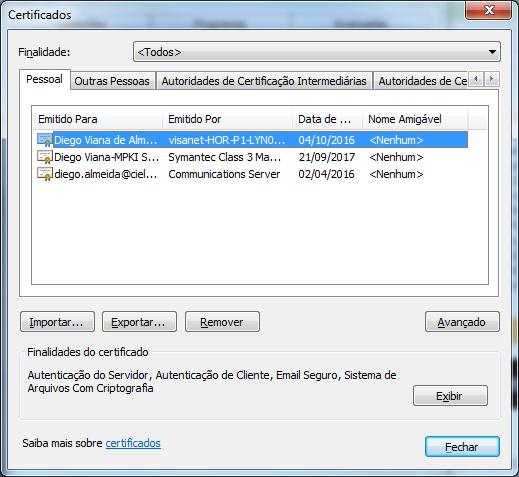
In Firefox, click on “View Certificates”, click on “Import”
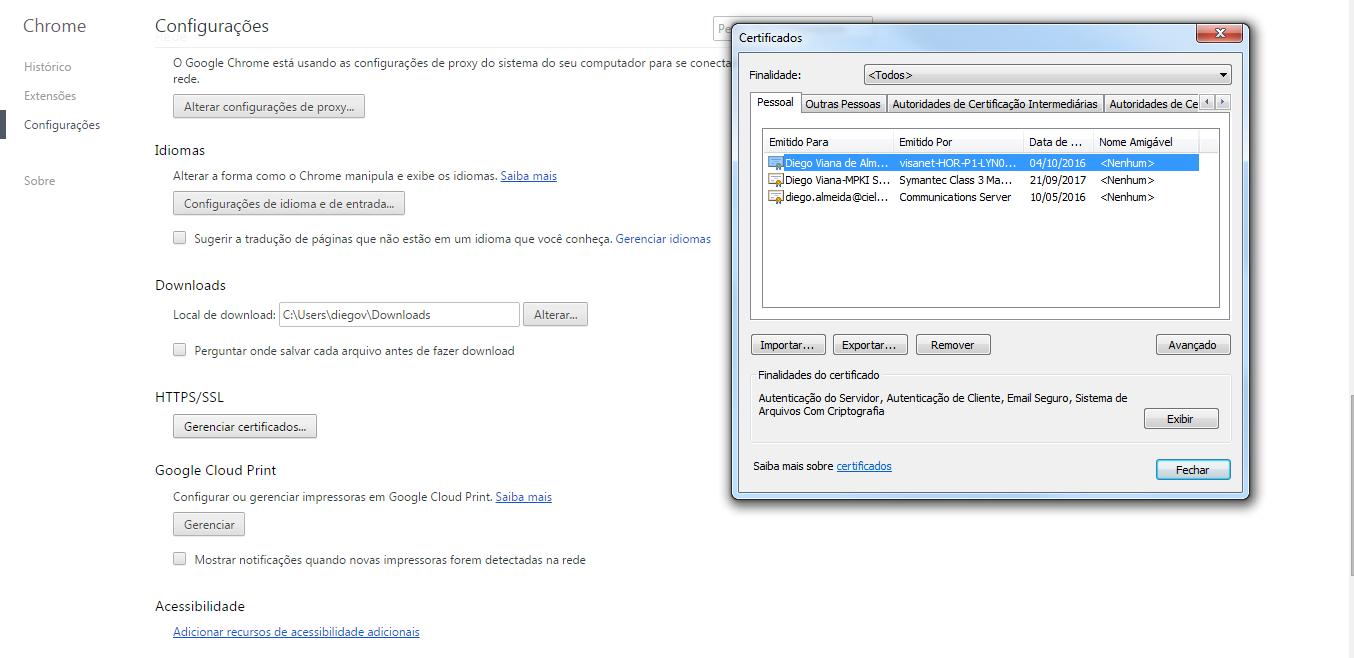
In Chrome, click on “Manage Certificates”, click on “Import”
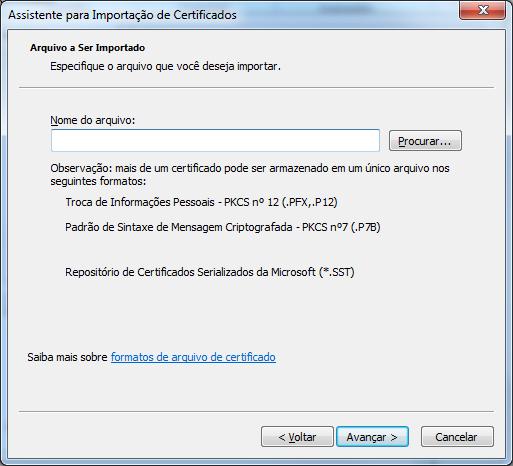
In Internet Explorer and Chrome “Certificate Import Wizard”, click on “Next”.
In Firefox “Servers Tab”, click on “Import”
In Chrome and Internet Explorer “Certificate Import Wizard”, click on “Search”, look for the folder where the files are and select the file “cieloecommerce.cielo.com.br.crt”, click on “Open” and then “Next”.
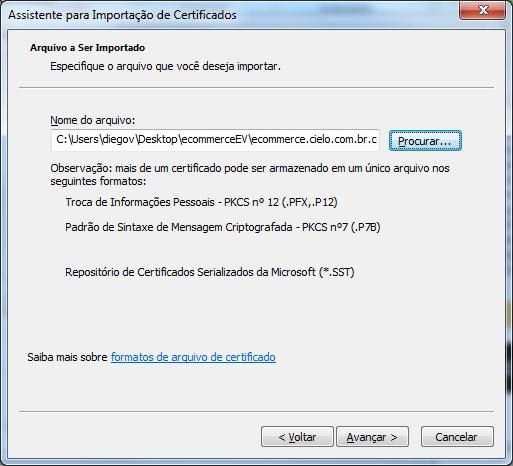
Select the desired option: add the Certificate in a default folder or search for the folder of your choice.
Click on “Finish”.
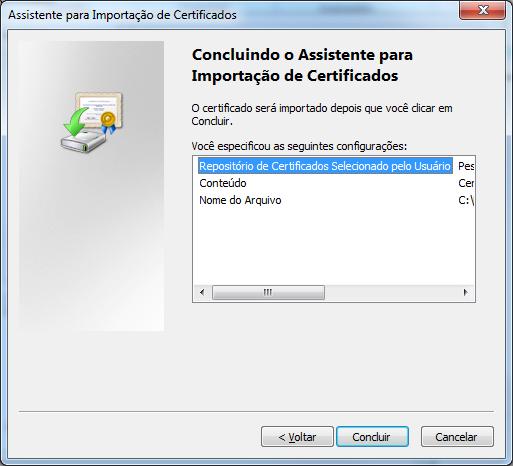
Click on “Ok” to complete the import.
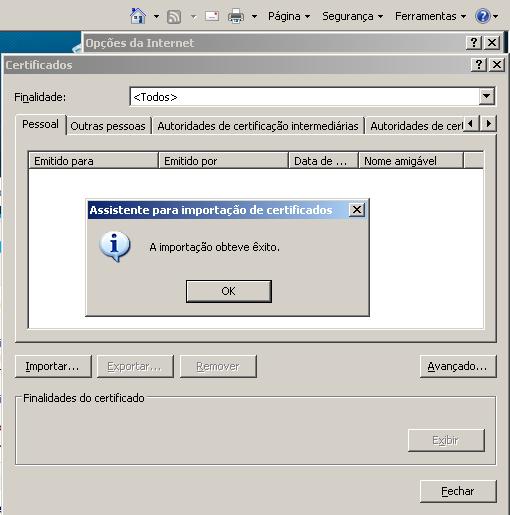
The Certificate may be viewed in the default tab “Other People” or at the one chosen by the customer.
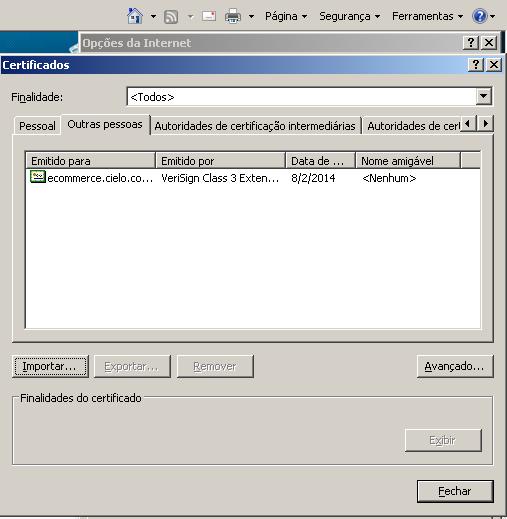
Repeat the same procedure for the 3 sent files.
Because it is a non-financial call, the Checkout API does not have a sandbox to test the creation of payment pages. Payment pages must be created by registrating on production. Enrollment can be done through the Cielo website or through a request from the establishment’s commercial manager.
Financial tests can be performed by activating test mode in your store settings.
Test mode can be activated in the Configurações tab, by enabling the Modo Teste checkbox. Test mode will only start when the selection is saved.
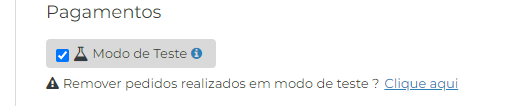
After saving, a red stripe will be displayed at the top of the screen. It will be displayed on all Checkout screens.
This stripe indicates that your store is now operating in a test environment, that is, every transaction carried out in this mode will be considered a test.
All transactions carried out in test mode will be displayed as normal transactions in the Pedidos tab, however, they will be marked as test transactions and will not be counted together with transactions carried out outside the test environment.
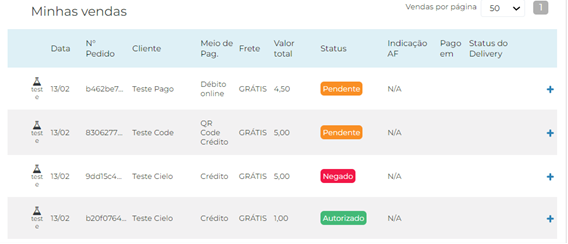
These transactions will have the test symbol differentiating them from your other transactions. They can be captured or canceled using the same procedures as real transactions.
IMPORTANT:
- When releasing your store to make sales to your customers, make sure that Test Mode is disabled;
- Transactions carried out in Test Mode can be completed normally, but will not be deducted from the customer’s card and cannot be transferred to the standard sales environment.
After activating test mode, transactions occur normally. The creation of the payment page can be done using the same parameters as the production environment, however, the payment methods to be used will be simulated means.
To carry out test transactions with different payment methods, follow the following rules:
To test credit or debit cards, it is necessary to use a card that follows the Luhn algorithm and which the final number corresponds to the desired card authorization status (see details in the table below).
Credit or debit card authorization status
| DESIRED TRANSACTION STATUS | CARD NUMBERS FOR PERFORMING TESTS |
|---|---|
| Authorized | Cards ending with 0 to 4. E.g.: XXXXXXXXXXXXXXX0 XXXXXXXXXXXXXXX1 XXXXXXXXXXXXXXX2 XXXXXXXXXXXXXXX3 XXXXXXXXXXXXXXX4 |
| Not Authorized | Cards ending with 5 to 9. E.g.: XXXXXXXXXXXXXXX5 XXXXXXXXXXXXXXX6 XXXXXXXXXXXXXXX7 XXXXXXXXXXXXXXX8 XXXXXXXXXXXXXXX9 |
Example: 5404434242930100 = Authorized
To test boleto transactions, carry out the purchase process normally without any changes to the procedure. The boleto generated in test mode will always be a simulated boleto.
In integration via API, the payment page is created based on sent data that forms a shopping cart. This data is divided into the following main nodes:
| NODE | DESCRIPTION |
|---|---|
Cart |
Contains data on the products to be sold. |
Shipping |
Contains data on the type of shipping to be charged. It is influenced by the Cart node. |
Payment |
Contains information that influences the amount charged. Does not contain information about payment methods. |
Customer |
Contains the shopper’s data. Not required on integration, but required on the payment screen. We suggest sending it to speed up the purchasing process. |
Options |
Controls optional Checkout features. Not mandatory. |
After sending the cart data, Checkout will send a response containing a link to the payment page in the CheckoutUrl field.
Important: The payment page creation request does not create a transaction. The returned URL (
CheckoutUrl) is just a “pre-order” indicating that the payment page is ready to be used. The transaction is only created when the shopper clicks Finalizar on the Checkout screen.
Check out an example of a request to create a payment page on Checkout Cielo.
Parameters in the header
All requests sent to Cielo must be authenticated by the merchant. Authentication for creating the payment page consists of sending the MerchantId in the request header:
| PARAMETER | TYPE | REQUIRED | SIZE | DESCRIPTION |
|---|---|---|---|---|
MerchantId |
GUID | Yes | 36 | Unique store identifier provided by Cielo after store affiliation. Format: 00000000-0000-0000-0000-000000000000 |
Content-type |
alphanumeric | Yes | n/a | Type of content of the message to be sent. Use: “application/json” |
{
  "OrderNumber": "Pedido01",
  "SoftDescriptor": "Nomefantasia",
  "Cart": {
    "Discount": {
      "Type": "Percent",
      "Value": 00
    },
    "Items": [
      {
        "Name": "Produto01",
        "Description": "ProdutoExemplo01",
        "UnitPrice": 100,
        "Quantity": 1,
        "Type": "Asset",
        "Sku": "ABC001",
        "Weight": 500
      }
    ]
  },
  "Shipping": {
    "SourceZipCode": "20020080",
    "TargetZipCode": "21911130",
    "Type": "FixedAmount",
    "Services": [
      {
        "Name": "Motoboy",
        "Price": 1,
        "Deadline": 15,
        "Carrier": null
      },
      {
        "Name": "UPS Express",
        "Price": 1,
        "Deadline": 2,
        "Carrier": null
      }
    ],
    "Address": {
      "Street": "Rua Cambui",
      "Number": "92",
      "Complement": "Apto 201",
      "District": "Freguesia",
      "City": "Rio de Janeiro",
      "State": "RJ"
    }
  },
  "Payment": {
    "BoletoDiscount": 15,
    "Installments": null,
    "MaxNumberOfInstallments": null
  },
  "Customer": {
    "Identity": "84261300206",
    "FullName": "Test de Test",
    "Email": "test@cielo.com.br",
    "Phone": "21987654321"
  },
  "Settings": null
}
Parameters in the body
IMPORTANT: The order identification number (OrderNumber) does not change throughout the transactional flow but an additional number could be generated for the order and used during the transaction. This number will only be different in case of non-compliance with the acquirer’s rules or in case of order identification numbers (OrderNumber) being repeated in less than 24 hours.
For your order number to be sent in the transaction, follow the following formatting standards:
| PARAMETER | DESCRIPTION | TYPE | SIZE | REQUIRED |
|---|---|---|---|---|
OrderNumber |
Order number sent by the store. If it is not sent, Checkout Cielo will generate a number, which will be viewed by the consumer. |
alphanumeric For reconciliation purposes, the characters allowed are only a-z, A-Z, 0-9, special characters and blank spaces are not allowed. |
64 For reconciliation purposes, the maximum size is 20. |
No |
SoftDescriptor |
Description to be presented on the cardholder’s credit card statement. | alphanumeric | 13 | No |
Cart.Discount.Type |
Required if Cart.Discount.Value is greater than or equal to zero. |
alphanumeric | 255 | Conditional |
Cart.Discount.Value |
Required if Cart.Discount.Type is Amount or Percent. |
number | 18 | Conditional |
Cart.Items.Name |
Name of the item in the cart.Example: Order ABC. | alphanumeric | 128 | Yes |
Cart.Items.Description |
Description of the item in the cart. Example: 50 pens - R$30.00 | alphanumeric | 256 | No |
Cart.Items.UnitPrice |
Unit price of the product in cents. Example: R$ 1.00 = 100 | number | 18 | Yes |
Cart.Items.Quantity |
Quantity of the item in the cart. Example: 1. | number | 9 | Yes |
Cart.Items.Type |
Type of the item in the cart. E.g.: Asset Digital Service Payment |
alphanumeric | 255 | Yes |
Cart.Items.Sku |
Product identifier. | alphanumeric | 32 | No |
Cart.Items.Weight |
Product weight. | number | 9 | Required if Shipping.Type is “Correios”**. |
Payment.BoletoDiscount |
Discount, in percentage, for payments to be made by boleto. | number | 3 | No |
FirstInstallmentDiscount |
Discount, in percentage, for payments by credit card. | number | 3 | No |
MaxNumberOfInstallments |
Defines maximum number of installments displayed on the payment page. | number | 2 | No |
Customer.Identity |
Shopper identification (CPF or CNPJ). If sent, this amount is already filled in on the Cielo Checkout screen. Not required in the API, but required in the transactional screen. | number | 14 | No |
Customer.FullName |
Full name of the shopper. Not required in the API, but required in the transactional screen. | alphanumeric | 288 | No |
Customer.Email |
Email of the shopper. If sent, this amount is already filled in on the Cielo Checkout screen. Not required in the API, but required in the transactional screen. | alphanumeric | 64 | No |
Customer.Phone |
Phone of the shopper. If sent, this amount is already filled in on the Cielo Checkout screen. Not required in the API, but required in the transactional screen. | number | 11 | No |
Options.ReturnUrl |
Fixed URL defined by the store that can be registered in the Checkout backoffice. After completing payment, the shopper can be redirected to a web page defined by the store. | string | 255 | No |
Shipping.Type |
Shipping type: Correios FixedAmount Free WithoutShippingPickUp WithoutShipping |
alphanumeric | 255 | Yes |
Shipping.SourceZipCode |
ZIP code of origin of the shopping cart. Required if Shipping.Type is “Correios”**. |
number | 8 | Conditional |
Shipping.TargetZipCode |
CEP of shopper’s shipping address. | number | 8 | No |
Shipping.Address.Street |
Street, avenue, etc., of the shopper’s delivery address. | alphanumeric | 256 | No* |
Shipping.Address.Number |
Shopper’s shipping address number. | alphanumeric | 8 | No* |
Shipping.Address.Complement |
Complement of the shopper’s shipping address. | alphanumeric | 14 | No |
Shipping.Address.District |
Shopper’s shipping address neighborhood. | alphanumeric | 64 | No* |
Shipping.Address.City |
City of shopper’s shipping address. | alphanumeric | 64 | No* |
Shipping.Address.State |
State (UF) of the shopper’s shipping address. | alphanumeric | 2 | No* |
Shipping.Services.Name |
Shipping service name. | alphanumeric | 128 | Yes |
Shipping.Services.Price |
Shipping service price in cents. E.g. R$ 1.00 = 100. | number | 18 | Yes |
Shipping.Services.Deadline |
Delivery time (in days). | number | 9 | No |
Shipping.Package |
Package type: “Box”: box “Rol”: cylinder or envelope. Find out more at Correios shipping calculation** |
alphanumeric | Whole | Yes |
Shipping.Length |
Package length. Find out more in Correios shipping calculation**. | number | Whole | Yes |
Shipping.Height |
Height of the package sent. Required if Shipping.Package is “Box” |
number | Whole | Conditional |
Shipping.Width |
Package width. Required if Shipping.Package is “Box” or “Envelope”. Find out more in Correios shipping calculation**. |
number | Whole | Conditional |
Shipping.Diameter |
Package diameter. Mandatory if Shipping.Package is “Rol”. Find out more in Correios shipping calculation**. |
number | Whole | Conditional |
*Not required, but submission is recommended.
See more information about the
Shippingnode in Defining shipping.
There are only two response options in API integration: success or error.
Important: The payment page creation request does not create a transaction, but rather the payment page URL (
CheckoutUrl). The success or error response refers to the creation of the payment page and is not related to the transaction.
✅ Success: in case of success, the response will be the content of the request plus the link that leads to the transactional screen (CheckoutUrl), highlighted in the following example:
{
  "Settings": {
    "CheckoutUrl": "https://cieloecommerce.cielo.com.br/transacional/order/index?id=123",
    "Profile": "CheckoutCielo",
    "Version": 1
  }
}
| PARAMETER | DESCRIPTION | TYPE | SIZE | |
|---|---|---|---|---|
CheckoutUrl |
URL of the transactional screen. The shopper must be directed to this environment to complete the transaction | string | 255 | |
Profile |
Retailer profile: fixed “CheckoutCielo”. | string | 16 | |
Version |
Version of the order creation service (version: 1). | string | Yes | 1 |
❌ Error: in case of error, the API returns the following message:
{
  "message": "An error has occurred."
}
| PARAMETER | DESCRIPTION | TYPE | SIZE |
|---|---|---|---|
Message |
Message describing the error. | string | 254 |
Checkout Cielo allows merchants to carry out credit transactions in up to 12 installments.
Important: Checkout is limited to up to 12 installments, even if your Cielo membership supports higher amounts. If the value shown in Configurações da loja on the Cielo website is less than 12, contact Cielo Support and check your Affiliation configuration.
In this option, the merchant can configure the number of installments per sale. Checkout calculates installments considering the total value and limit of installments sent via API.
Attention: The number of desired installments must be less than the quantity registered in Configurações da loja (merchant settings) on the Cielo website.
Characteristics
Installments via API are carried out by sending the MaxNumberOfInstallments field within the Payment node. This will force Checkout to recalculate the installment amount. Below is an example of the node:
"Payment": {
  "MaxNumberOfInstallments": 3
}
| PARAMETER | DESCRIPTION | TYPE | SIZE | REQUIRED? |
|---|---|---|---|---|
MaxNumberOfInstallments |
Defines maximum number of installments displayed on the payment page. | number | 2 | No |
Checkout Cielo allows the store to apply specific discounts to both the cart and payment methods. The discounts available at Checkout Cielo are:
| DISCOUNT | DESCRIPTION | |
|---|---|---|
| Carrinho | Applies the discount to the entire cart, regardless of the payment method. | |
| Meio de pagamento - boleto | Apply the discount when the chosen payment method is boleto. | |
| Meio de pagamento - crédito à vista | Applies the discount when the chosen payment method is a credit card with one installment. |
Note: You can apply discounts via API or Cielo website. If a discount value is sent on the API, this will be the value considered, even if the Cielo website has another value registered.
To send a discount on the cart, simply send the Discount node within the Cart node:
{
  "Discount": {
    "Type": "Percent",
    "Value": 00
  }
}
| PARAMETER | DESCRIPTION | TYPE | SIZE | REQUIRED? |
|---|---|---|---|---|
Cart.Discount.Type |
Type of discount to be applied: “Amount” (value) or “Percent” (percentage). Required if Cart.Discount.Value is greater than or equal to zero. |
alphanumeric | 255 | No |
Cart.Discount.Value |
Discount value to be applied: “Amount” (value) or “Percent” (percentage). Required if Cart.Discount.Type is “Amount” or “Percent”. |
number | 18 | No |
To send a discount on the invoice and/or credit card send the corresponding field within the Payment node:
BoletoDiscount for boleto;FirstInstallmentDiscount for credit card in only one installment.Example
{
  "Payment": {
    "BoletoDiscount": 15,
    "FirstInstallmentDiscount": 90
  }
}
| PARAMETER | DESCRIPTION | TYPE | SIZE | REQUIRED? |
|---|---|---|---|---|
Payment.BoletoDiscount |
Discount, in percentage, for payments to be made by boleto. | number | 3 | No |
Payment.FirstInstallmentDiscount |
Discount, in percentage, for payments by credit card with only one installment. | number | 3 | No |
Cielo Checkout allows you to define five shipping options in the Shipping.Type parameter.
| SHIPPING TYPE | VALUE OF PARAMETER Shipping.Type |
DESCRIPTION |
|---|---|---|
| Fixed shipping | “FixedAmount” | Fixed amount sent by the merchant. Used if the merchant has its own delivery method. |
| Free shipping | “Free” | Does not perform shipping calculations and displays “Free Shipping” on the transactional screen. |
| Store Pickup | “WithoutShippingPickUp” | Deemed Store Pickup. |
| No shipping | “WithoutShipping” | No shipping charges (applicable to services and digital products). |
| Post office | “Correios” | Uses the Correios API to calculate the cost. The calculation value will depend on the contract used (informed in the Merchant Settings) and the type of integration for calculation. |
Note: Options for multiple shipping in the Post Office category must be selected within Configurações da loja (merchant settings) on the Cielo website.
Check out the nodes that form the shipping information below:
Shipping: base node. It is mandatory for integration via API. It defines the types of freight to be used| PARAMETER | DESCRIPTION | TYPE | SIZE | REQUIRED? |
|---|---|---|---|---|
Shipping.Type |
Shipping type: Correios FixedAmount Free WithoutShippingPickUp WithoutShipping |
alphanumeric | 255 | Yes |
Shipping.SourceZipCode |
ZIP code of origin of the shopping cart. Required if Shipping.Type is “Correios”. |
number | 8 | Conditional |
Shipping.TargetZipCode |
CEP of shopper’s shipping address. | number | 8 | No |
Shipping.Address: shipping address information. Not required in the API contract, but we suggest that this data be sent if it has already been collected within the store environment. If they have not been collected, the payment page will display address fields for the shopper to fill out.| PARAMETER | DESCRIPTION | TYPE | SIZE | REQUIRED? |
|---|---|---|---|---|
Shipping.Address.Street |
Street, avenue, etc., of the shopper’s delivery address. | alphanumeric | 256 | No* |
Shipping.Address.Number |
Shopper’s shipping address number. | alphanumeric | 8 | No* |
Shipping.Address.Complement |
Complement of the shopper’s shipping address. | alphanumeric | 14 | No |
Shipping.Address.District |
Shopper’s shipping address neighborhood. | alphanumeric | 64 | No* |
Shipping.Address.City |
City of shopper’s shipping address. | alphanumeric | 64 | No* |
Shipping.Address.State |
State (UF) of the shopper’s shipping address. | alphanumeric | 2 | No* |
*Not required, but submission is recommended
Shipping.Services: used for fixed shipping, such as shipping services contracted by the store.| PARAMETER | DESCRIPTION | TYPE | SIZE | REQUIRED? |
|---|---|---|---|---|
Shipping.Services.Name |
Shipping service name. | alphanumeric | 128 | Yes |
Shipping.Services.Price |
Shipping service price in cents. Ex: R$ 1.00 = 100. | number | 18 | Yes |
Shipping.Services.Deadline |
Delivery time (in days). | number | 9 | No |
Shipping calculation is done using the Correios API and can be of two types:
To use shipping with volume, submit the Shipping.Measures node, following the integration rules via REST API.
Shipping.Measures: indicates the package measurements.| PARAMETER | DESCRIPTION | TYPE | SIZE | REQUIRED? |
|---|---|---|---|---|
Shipping.Package |
Package type: “Box”: box “Roll”: cylinder or envelope. |
alphanumeric | Whole | Yes |
Shipping.Length |
Package length | number | Whole | Yes |
Shipping.Height |
Height of the package sent. Required if Shipping.Package is “Box”. |
number | Whole | Conditional |
Shipping.Width |
Package width. Required if Shipping.Package is “Box” or “Rol”. |
number | Whole | Conditional |
Shipping.Diameter |
Package diameter. Required if Shipping.Package is “Rol”. |
number | Whole | Conditional |
To calculate shipping via the Correios, it is necessary to respect the measurements defined by the contract used by the merchant. For more information about the dimensions and weights allowed, we suggest that you validate the store contract in Termo de Condições de Prestação de Serviços de Encomendas Nacionais dos Correios (Term of Conditions for the Provision of National Correios Services)
Recurrence is an automatic scheduling process for credit transactions, that is, it is a transaction that will be repeated automatically, without the need for the shopper to access the transactional screen, in accordance with the rules defined at the time of scheduling.
If one of the transactions is not authorized, Checkout Cielo automatically retrys; for more details about automatic retry, see the Recurrence Retry section
Recurring transactions are ideal for business models that involve the concept of subscription, plan or monthly fee in their form of billing, such as:
The recurring transaction is different from an installment transaction. In the recurring transaction, the limit of the customer’s card is only committed by the amount of the subscription in the chosen period, that is, if it is monthly, only the amount of the monthly fee on the customer’s card will be committed. -Insurance subscription in the amount of R$ 100.00 and with monthly billing for one year: every month, only R$ 100.00 of the card limit will be committed.
In the installment transaction, the limit committed on the customer’s card is the It is the total amount of the sale, regardless of the amount of the value of each installment. -Sale of a refrigerator in the amount of R$ 2000.00 in 10 installments of R$ 200.00: the entire amount of the purchase will be committed - (R$ 2000.00) - even if only R$ 200.00 per month is charged on the customer’s card statement.
A recurring transaction in Checkout Cielo has two settings: Interval and End date.
"Payment": {
        "RecurrentPayment": {
            "Interval": "Monthly",
            "EndDate": "2018-12-31"
        }
}
| PARAMETER | DESCRIPTION | TYPE | SIZE | REQUIRED | |
|---|---|---|---|---|---|
Payment.RecurrentPayment.Interval |
Interval between each recurring transaction | “Monthly”; “Bimonthly”; “Quarterly”; “SemiAnnual”; “Annual” |
alphanumeric | 10 | No |
Payment.RecurrentPayment.EndDate |
Recurrence end date. If not sent, the recurrence ends only if cancelled. | date (YYYY-MM-DD format) | 255 | No |
The shopper’s credit card data is stored securely at Cielo, allowing it to be reused in a recurring transaction. This data is not accessed by the retailer and this intelligence is controlled by Checkout Cielo.
{
  "OrderNumber": "12344",
  "SoftDescriptor": "Name that will show up on the invoice",
  "Cart": {
    "Discount": {
      "Type": "Percent",
      "Value": 10
    },
    "Items": [
      {
        "Name": "Product name",
        "Description": "Product description",
        "UnitPrice": 100,
        "Quantity": 2,
        "Type": "Asset",
        "Sku": "Product Sku",
        "Weight": 200
      }
    ]
  },
  "Shipping": {
    "Type": "Correios",
    "SourceZipCode": "14400000",
    "TargetZipCode": "11000000",
    "Address": {
      "Street": "Delivery address",
      "Number": "123",
      "Complement": "",
      "District": "Delivery neighbourhood",
      "City": "Delivery city",
      "State": "SP"
    },
    "Services": [
      {
        "Name": "Shipping service",
        "Price": 123,
        "Deadline": 15
      }
    ]
  },
  "Payment": {
    "BoletoDiscount": 0,
    "DebitDiscount": 0,
    "RecurrentPayment": {
      "Interval": "Monthly",
      "EndDate": "2015-12-31"
    }
  },
  "Customer": {
    "Identity": 11111111111,
    "FullName": "Fulano Comprador da Silva",
    "Email": "fulano@email.com",
    "Phone": "11999999999"
  }
}
Example: physical asset
If the product type is physical asset (Cart.Items.Type = “Asset”), the API requires the shipping type (Shipping.Type) to be sent.
If there is a recurrence node in the technical contract, it is required to send the type WithoutShipping, otherwise the following response will be presented:
{
  "message": "The request is invalid.",
  "modelState": {
    "[Shipping.Type]": [
      "[Shipping.Type] pedidos com recorrência devem possuir o Shipping.Type 'WithoutShipping'."
    ]
  }
}
Important: The recurrence is only created if the transaction is authorized. Regardless of capture or not, once authorized, the recurrence process begins.
If one of the recurrence transactions is not authorized, Checkout Cielo automatically performs the retry, sending a new transaction, considering:
Note: This process aims to obtain a positive response from the authorization process, preventing the retailer from losing the sale. The retry process generates duplicate orders within the Backoffice, as the original denied order will be displayed in the Orders list, along with the new authorized transaction.
Attention: The retry rule cannot be modified by the retailer.
It is possible to query and cancel recurring transactions on the Cielo website.
To change recurrence data, access the Cielo website, where you can change:
These changes can be made through two channels. Check below what they are and the respective guidelines:
To change data from a recurrence using the Cielo Checkout API, simply send a request with the information to be changed. Check out an example of this request.
Parameters in the header
{
  "PagadorRecurrentPaymentId": "0207CE76-8144-48DC-8B17-876465BC3A6D",
  "EndDate": "2030-12-31",
  "Interval": 1,
  "NextPaymentDate": "2024-12-31",
  "Amount": "33333.33",
  "Day": "31"
}
Parameters in the body
| PARAMETER | DESCRIPTION | TYPE | MAXIMUM SIZE | REQUIRED |
|---|---|---|---|---|
PagadorRecurrentPaymentI |
Recurrence identification number at Checkout. | GUID | 36 | Yes |
Amount |
Recurrence value in cents (ex: R$ 1.00 = 100) | number | 10 | No |
interval |
Recurrence billing interval in months. “Monthly” - 1 “Bimonthly” - 2 “Quarterly” - 3 “SemiAnnual” - 6 “Annual “ - 12 |
number | 10 | No |
EndDate |
Recurrence end date. If not sent, the recurrence ends only if cancelled. | date (YYYY-MM-DD) | 255 | No |
Day |
Day of the month on which the recurrence charge is made. | date (DD) | 2 | No |
NextPaymentDate |
Date of the next recurring charge. If changed, the next charges will follow this date. Example: in a monthly interval recurrence, the day of the month on which the charge is made is always the 10th. The first charge was on 10/01/2024, so the next billing would be 10/02/2024. If this next billing date is changed to 20/02/2024, from then on, the next charges will be on the 20th of the month, monthly. |
date (YYYY-MM-DD) | 10 | No |
HTTP Status: 200 - OK
{
" Recurrent Payment - {id} Updated Successfully"
}
To query the data for a recurrence and the transactions linked to it, you must use the recurrence ID sent after creating a recurrence.
The query must be made by sending the access_token as authentication.
Parameters in the header
{

    "$id": "1",

    "id": 202,

    "pagadorRecurrentPaymentId": "0207ce76-8144-48dc-8b17-876465bc3a6d",

    "recurrentPaymentStatus": 1,

    "recurrentPaymentStatusEnum": 1,

    "isRecurrentPaymentExpired": false,

    "allowEdit": true,

    "startDate": "2024-02-05T15:05:44.423",

    "endDate": "2026-03-30T00:00:00",

    "formatedEndDate": "30/03/2026",

    "day": 10,

    "items": [

        {

            "$id": "2",

            "name": "teste leo",

            "quantity": 1,

            "unitPrice": 1000,

            "totalPrice": 1000,

            "formattedUnitPrice": "R$ 10,00",

            "formattedTotalPrice": "R$ 10,00"

        }

    ],

    "item": {

        "$ref": "2"

    },

    "history": [

        {

            "$id": "3",

            "orderId": "c748ef42-d1e7-4db3-9633-8d057bf874b0",

            "orderNumber": "8245e94dcf4c4de3906118e38f376822",

            "merchantOrderNumber": "12345",

            "createdDate": "2024-02-05T15:05:44.457",

            "paymentStatus": 7,

            "paymentStatusDescription": "Autorizado"

        }

    ],

    "lastPaymentDate": "0001-01-01T00:00:00",

    "nextPaymentDate": "2026-02-05T00:00:00",

    "formatedNextPaymentDate": "05/02/2026",

    "intervalDescription": "Mensal",

    "recurrentPaymentStatusDescription": "Ativa",

    "amount": 4000.0

}
| PROPERTY | TYPE | MAXIMUM SIZE | DESCRIPTION | FORMAT |
|---|---|---|---|---|
$id |
number | 10 | Payload list index. | Example: 1 |
id |
number | 100 | Recurrence record index (disregard value for query purposes). | Example: 202 |
pagadorRecurrentPaymentId |
GUID | 36 | Recurrence identification number at Checkout. | Example: 0207ce76-8144-48dc-8b17-876465bc3a6d |
recurrentPaymentStatus |
number | 1 | Status of the recurrence (whether it is active or not). | Example: 1 |
recurrentPaymentStatusEnum |
number | 1 | Status of the recurrence (whether it is active or not) | Example: 1 |
isRecurrentPaymentExpired |
boolean | 5 | Informs whether the recurrence is expired. | Example: false |
allowEdit |
number | 1 | Whether to allow recurrence editing or not | Example: true |
startDate |
text | 20 | Recurrence start date. | Example: 2024-02-05T15:05:44.423 |
endDate |
text | 20 | Recurrence end date. If not sent, the recurrence ends only if deactivated by the merchant. | Example: 2026-03-30T00:00:00 |
formatedEndDate |
text | 10 | Recurrence end date, formatted. If not sent, the recurrence ends only if deactivated by the merchant. | Example: 30/03/2026 |
day |
number | 2 | Day of the month on which the recurrence charge is made. | Example: 30 |
Items.$id |
number | 10 | Item list index. | Example: 2 |
Items.name |
text | 256 | Description of the item in the order cart. | Example: bag of cookies |
Items.quantity |
number | 10 | Quantity of items in the cart. | Example: 1 |
Items.unitPrice |
number | 10 | Unit price of the item, in cents. (R$ 1.00 = 100) | Example: 1000 |
Items.totalPrice |
number | 10 | Total price for the quantity of the same item. (R$ 1.00 = 100) | Example: 1000 |
Items.formattedUnitPrice |
text | 10 | Unit price of the item, formatted. | Example: R$10.00 |
Items.formattedTotalPrice |
text | 10 | Total price for the quantity of the same item, formatted. | Example: R$10.00 |
Item.$ref |
text | 10 | Returns the index of the first item. | Example: 2 |
history.$id |
number | 10 | Item list index. | Example: 3 |
history.orderId |
text | 36 | Internal order ID, not used for queries. | Example: 8390bbdc-8c0a-42bb-a144-3712ee1a1fad |
history.createdDate |
text | 23 | Recurrence request creation date. | Example: 2024-02-08T17:56:29.51 |
history.paymentStatus |
number | 10 | Code referring to the payment status. | Example: 7 |
history.paymentStatusDescription |
text | 30 | Description regarding the payment status: 0 - Undefined; 1 - Pending; 2 - Paid; 3 - Denied; 4 - Expired; 5 - Canceled; 6 - Not Finalized; 7 - Authorized. |
Example: Authorized |
lastPaymentDate |
text | 23 | Date of the last payment of the recurrence. If there is no payment yet, it will return “0001-01-01T00:00:00”. | Example: 2024-01-29T00:00:00 |
nextPaymentDate |
text | 20 | Date of the next recurrence charge, without formatting. | Example: 2026-02-05T00:00:00 |
formattedNextPaymentDate |
text | 10 | Date of the next recurrence charge, formatted. | Example: 05/02/2026 |
intervalDescription |
string | 128 | Recurrence billing interval. “Monthly”; “Bimonthly”; “Quarterly”; “SemiAnnual”; “Annual” |
Example: Monthly |
recurrentPaymentStatusDescription |
text | 50 | Description of the recurrence status. See the Recurrence status table. | Example: Active |
amount |
number | 10 | Unit price of the recurrence, in cents. (R$ 1.00 = 100) | Example: 4000.0 |
To deactivate a recurrence, send the following request.
Parameters in the header
It is not necessary to send any parameters in the body.
The transactional notification process occurs in two steps, which are transaction completion notification and status change notification.
| STEP | URL TYPE* | DESCRIPTION | CONTENT | FORMAT |
|---|---|---|---|---|
| Transaction completion notification | Notification URL |
It is sent after the shopper clicks on Finalizar (complete), generating the transaction. This notification is only sent at the moment the transaction is completed, regardless of whether there was change of status, that is, it does not mean that the transaction has been paid. | Contains all sales data. | POST or JSON |
| Status change notification | Status Change URL |
It is sent when the status of the transaction changes. The status can be changed from “Pending” to “Paid”, “Canceled” or “Unfinished”, among others. See the complete list of statuses in the [Payment_status] table. |
Contains order identification data (does not have cart data). | POST |
*Notifications are sent to the URLs defined by the establishment in Merchant Settings and contain data on transactions carried out at Checkout.
It is worth noting that Checkout only carries out a notification when a transaction is considered complete, that is, the shopper has filled in all the details on the payment screen and clicked Finalizar (complete)
Example: The shopper accesses the payment link and chooses to pay via Pix. When you click Finalizar, Checkout generates the Pix key and sends the transaction completion notification to the merchant, which will have the “Pending” status. When the shopper makes the payment via Pix, the transaction will have the status “Paid” and Checkout will send a status change notification.
Notification URLs are webhooks that can receive a notification via POST or via JSON:
| TYPE | DESCRIPTION |
|---|---|
| POST | Notification where the store is passive. |
| JSON | Notification where the store carries out a query. |
Notification format
In notifications supported by the Checkout API, the format sent is Form Data, broken down by the Content-Type header ‘x-www-form-urlencoded’.
Expected return
The store server must send the return HTTPStatus = 200 (OK) to the Checkout API, indicating that the notification was received and processed successfully.
IMPORTANT: If the registered URL returns an error or is unavailable, three new attempts will be made, with an interval of one hour between each POST.
If the notification is not received, it is possible to request a resend manually in Detalhes do pedido, by clicking on the arrow icon.
It is the notification sent to the Notification URL and can be in POST or JSON format.
Contains all transaction data, including merchant_order_number and checkout_cielo_order_number, which can be used for querying transactions
Example:
order_number: "40e00eefbf094763a147af713fa07ece",
amount: "5000",
checkout_cielo_order_number: "b9ab1956738d45cc88edf51d7d03b13e",
created_date: "02/02/2023 17:01:35",
customer_name: "customer name",
customer_phone: "2222222222",
customer_identity: "12312312344",
customer_email: "name@email.com.br",
shipping_type: "5",
shipping_price: "0",
payment_method_type: "6",
payment_installments: "1",
payment_status: "1",
test_transaction: "False",
product_id: "0f48e580-d0a2-4e3b-a748-6704927f1725",
product_type: "3",
product_description: "123",
nsu: "00339922"
See the description of transaction details in the Notification content section
Notification via JSON is a safer and more flexible method for making a query at Checkout Cielo. In this modality, the merchant receives the MerchantId and MerchantOrderNumber and a URL to perform a query (GET) against the Checkout Cielo database and access the details of the transaction.
Notification content via JSON
MerchantId: "799g0de8-89c3-5d17-c670-6b29d7f00175",
MerchantOrderNumber: "1db9226geg8b54e6b2972e9b745b89c7",
Url: "https://cieloecommerce.cielo.com.br/api/public/v1/orders/799g0de8-89c3-5d17-c670-6b29d7f00175 /1db9226geg8b54e6b2972e9b745b89c7"
| PARAMETER | DESCRIPTION | FIELD TYPE |
|---|---|---|
URL |
URL with the data necessary to search for transaction data. | string |
MerchantId |
Merchant identifier at Checkout; It appears on the Cielo website in the Configuralão > Dados Cadastrais menu | alphanumeric (guid) |
MerchantOrderNumber* |
Merchant order number; if not sent, Checkout Cielo will generate a number, which will be viewed by the Consumer | alphanumeric For reconciliation purposes, the characters allowed are only a-z, A-Z, 0-9. Special characters and whitespace are not allowed. |
*In other requests and responses it may be called OrderNumber.
The store server must send the return HTTP Status = 200 (OK) to the Checkout API, indicating that the notification was received and processed successfully.
Example of a URL query returned via JSON
Response
{
    "order_number": "1db9226geg8b54e6b2972e9b745b89c7",
    "amount": 101,
    "discount_amount": 0,
    "checkout_cielo_order_number": "65930e7460bd4a849502ed14d7be6c03",
    "created_date": "10-03-2023 14:38:56",
    "customer_name": "Test Test",
    "customer_phone": "11987654321",
    "customer_identity": "445556667",
    "customer_email": "shopper@email.com.br",
    "shipping_type": 1,
    "shipping_name": "Motoboy",
    "shipping_price": 1,
    "shipping_address_zipcode": "06455-030",
    "shipping_address_district": "Alphaville",
    "shipping_address_city": "Barueri",
    "shipping_address_state": "SP",
    "shipping_address_line1": "Alameda Xingu",
    "shipping_address_line2": "Apto 25",
    "shipping_address_number": "512",
    "payment_method_type": 1,
    "payment_method_brand": 1,
    "payment_maskedcreditcard": "482852******6856",
    "payment_installments": 1,
    "payment_status": 3,
    "tid": "10558590697J62OH9BPB",
    "test_transaction": "False"
}
See the description of the sale details in the Notification content section.
Whether notifying via POST or via JSON, the content of the data returned is the same. All returned fields are described below, as well as their definitions and sizes:
|PARAMETER|DESCRIPTION|TYPE|MAXIMUM SIZE|
|—|—|—|—|
|checkout_cielo_order_number|Unique identifier generated by Checkout Cielo| alphanumeric|32|
|amount|Unit price of the product, in cents (e.g.: R$ 1,00 = 100)|numeric|10|
|order_number|Order number sent by the store.
If not sent, Checkout Cielo will generate a number that will be viewed by the consumer| alphanumeric
For reconciliation purposes, the characters allowed are only a-z, A-Z, 0-9. Special characters and whitespace are not allowed.|32
For reconciliation purposes, the maximum length is 20 characters.|
|created_date|Date of order creation - dd/MM/yyyy HH:mm:ss| alphanumeric|20|
|customer_name|Name of the customer. If sent, this value is already filled in the Checkout Cielo screen| alphanumeric|289|
|customer_identity|Customer identification (CPF or CNPJ). If sent, this value is already filled in the Checkout Cielo scree| alphanumeric|14|
|customer_email|Customer e-mail. If sent, this value is already filled in the Checkout Cielo screen| alphanumeric|64|
|customer_phone|Customer phone number. If sent, this value is already filled in the Checkout Cielo screen.| numeric| 11|
|discount_amount| Discount amount provided (sent only if there was a discount).|numeric|10|
|first_installment_discount|Discount, in percentage, for payments by credit card.| Whole number from 1 to 100|3|
|shipping_type|Shipping mode|numeric|1|
| shipping_name| Shipping name| alphanumeric | 128|
| shipping_price| Value of the shipping service, in cents (e.g.: R$ 10,00 = 1000)|numeric|10|
| shipping_address_zipcode|Delivery address zip code| numeric|8|
| shipping_address_district|Delivery address neighborhood| text|64|
| shipping_address_city| Delivery address city| alphanumeric| 64|
| shipping_address_state|Delivery address state| alphanumeric|64|
| shipping_address_line1|Delivery address| alphanumeric | 256|
| shipping_address_line2|Delivery address complement| alphanumeric | 14|
| shipping_address_number| Delivery address number | numeric|8|
| payment_method_type| Payment method type code | numeric| 1|
| payment_method_brand|Card brand (only for transactions with credit card payment method)| numeric| 1|
| payment_method_bank| Issuer bank (For Automatic Debit and Boleto transactions)| numeric| 1|
| payment_maskedcredicard|Masked Card (Only for transactions with credit card payment means)| alphanumeric | 20|
|payment_installments|Number of installments| numeric| 1|
| payment_antifrauderesult| Status of Credit Card Transactions in Antifraude| numeric| 1|
| payment_boletonumber| Number of boleto generated| string| 1|
| payment_boletoexpirationdate | Due date for transactions made with boleto| string| 10|
| payment_status|Transaction status| numeric| 1|
| tid| TransactionId Cielo generated at the time of transaction authorization | alphanumeric | 20|
| test_transaction| Indicates whether the transaction was generated with 'Test Mode' enabled | boolean| 32|
|product_id|Identifier of the Payment Button/Link that generated the transaction|alphanumeric|36|
|product_type|Type of Button that generated the order (See ProductID table)|alphanumeric|32|
|product_sku|Product identifier registered in the payment link|text|16|
|product_max_number_of_installments|Number of installments released by retailers for the payment link|number|2|
|product_expiration_date|Button/Payment Link expiration date|alphanumeric|12|
|product_quantity|Number of transactions remaining until the link stops working|alphanumeric|2|
|product_description|Description of the payment link registered by the merchant|text|256|
|nsu|NSU - Unique sequential number of the transaction.|alphanumeric|6|
|authorization_code`|Authorization code.|alphanumeric|8|
| PAYMENT LINK TYPE | ENUN |
|---|---|
| Physical asset | 1 |
| Digital | 2 |
| Service | 3 |
| Payment | 4 |
| Recurrence | 5 |
Checkout has its own status, different from the Cielo website or the Cielo E-commerce API. See the full list at Payment_status.
Note: For order queries, the
payment.statusfield will be returned in text format, always in English (Transaction Status column).
Antifraud has the concept of Status and SubStatus, where the former represents the level of risk that a transaction has of being a fraud, and the latter, additional information about the transaction.
| VALUE | ANTIFRAUD STATUS | SUBSTATUS | DESCRIPTION |
|---|---|---|---|
| 1 | Low Risk | Low Risk | Low risk of being a fraudulent transaction. |
| 2 | High Risk | High Risk | High risk of being a fraudulent transaction. They are canceled automatically. |
| 4 | Not finished | Not finished | The query could not be finalized. |
| N/A | N/A | Not applicable | Debit card transaction that was authenticated by 3DS 2.0, therefore not eligible for anti-fraud analysis. |
| N/A | N/A | N/A | Non-analyzable payment method such as boleto, Pix, QR Code, and credit card transaction that was denied by the issuer. |
| N/A | N/A | Recurrence transaction | For recurrence cases, after the first paid transaction, the next transactions of a recurrence are not analyzed by anti-fraud. Only the first transaction is analyzed. |
Checkout only allows one type of Boleto per establishment, so the notification does not return whether the provider used was Bradesco or Banco do Brasil, as only one of them will be active in the affiliation.
| VALUE | DEFINITION | DESCRIPTION |
|---|---|---|
| 1 | Credit Card | CreditCard |
| 2 | Boleto | Boleto |
| 4 | Debit Card | DebitCard |
| 5 | QR Code Credit | QrCode |
| 6 | Pix | Pix |
| 7 | QRCode Debit | QrCodeDebit |
Note: For queries, the type is returned in the
Payment.Typefield and is filled with the literal value (Description).
Represents the card brand.
| VALUE | DESCRIPTION |
|---|---|
| 1 | Visa |
| 2 | Master |
| 3 | AmericanExpress |
| 4 | Diners |
| 5 | Elo |
| 6 | Aura |
| 7 | JCB |
| 8 | Discover |
| 9 | HiperCard |
In queries, the card brand is returned in the Payment.Brand field and is filled in with the literal value.
| VALUE | DESCRIPTION |
|---|---|
| 1 | Banco do Brasil |
| 2 | Bradesco |
| VALUE | DESCRIPTION |
|---|---|
| 1 | Correios |
| 2 | Fixed shipping |
| 3 | Free shipping |
| 4 | Collect by hand/store |
| 5 | No shipping charges (services or digital products) |
It is sent to the status change URL and contains the checkout_cielo_order_number, the new status and some transaction data.
To find out more details about the transaction, make a query using checkout_cielo_order_number.
The status change notification format is POST (form data).
checkout_cielo_order_number: "b918afea483d4c6c8615d8a8e19803c1",
amount: "134",
order_number: "024f77ac98cb493b86d8c818eb6e79cd",
payment_status: "3",
test_transaction: "False",
brand: "Visa",
nsu: "000001",
authorization_code: "01234567"
| PARAMETER | DESCRIPTION | FIELD TYPE | MAXIMUM SIZE |
|---|---|---|---|
checkout_cielo_order_number |
Unique identifier generated by Checkout Cielo. | alphanumeric | 32 |
amount |
Unit price of the product, in cents (ex: R$ 1.00 = 100) | number | 10 |
order_number |
Order number sent by the store. If it is not sent, Checkout Cielo will generate a number, which will be viewed by the consumer. |
alphanumeric For reconciliation purposes, the characters allowed are only a-z, A-Z, 0-9. Special characters and blank spaces are not allowed. |
32 |
payment_method_brand |
Brand - only for transactions using a credit card payment method. Full list | number | 20 |
payment_status |
Transaction status. Full List | number | 1 |
test_transaction |
Indicates whether the transaction was generated with Test Mode activated | boolean | 32 |
nsu |
NSU - Unique sequential number of the transaction. | alphanumeric | 6 |
authorization_code |
Authorization code. | alphanumeric | 8 |
Transaction queries via API can be made up to 45 days after the sale has been made.
The query must be made using the Transactional Control API, sending the access_token as authentication.
Order inquiries can be made by:
order_number:is the MerchantOrderNumber returned in the transaction completion notification;checkout_cielo_order_number: is returned in the transaction completion notification or in the status change notification.Querying transactions by order_number returns a list of transactions with the same order number; This occurs because Checkout does not prevent the store from duplicating order_numbers. The response will return checkout_cielo_order_number, which must be used when querying a specific transaction.
To query a transaction by order_number, do a GET.
Parameter in query string
| Parameter | Description | Type | Size | Format |
|---|---|---|---|---|
order_number |
Store order number. This is the MerchantOrderNumber returned in the notification. |
string | - | Example: 1db9226geg8b54e6b2972e9b745b23c4 |
[
    {
        "$id": "1",
        "checkoutOrderNumber": "a58995ce24fd4f1cb025701e95a51478",
        "createdDate": "2023-03-30T12:09:33.57",
        "links": [
            {
                "$id": "2",
                "method": "GET",
                "rel": "self",
                "href": "https://cieloecommerce.cielo.com.br/api/public/v2/orders/a58995ce24fd4f1cb025701e95a51478"
            }
        ]
    },
    {
        "$id": "3",
        "checkoutOrderNumber": "438f3391860a4bedbae9a868180dda6e",
        "createdDate": "2023-03-30T12:05:41.317",
        "links": [
            {
                "$id": "4",
                "method": "GET",
                "rel": "self",
                "href": "https://cieloecommerce.cielo.com.br/api/public/v2/orders/438f3391860a4bedbae9a868180dda6e"
            }
        ]
    }
]
| Property | Description | Type | Size | Format |
|---|---|---|---|---|
$id |
Node ID. | number | - | Example: 1 |
checkoutOrderNumber |
Order code generated by Checkout Cielo. | text | 32 | Example: a58995ce24fd4f1cb025701e95a51478 |
createdDate |
Order creation date | date | - | YYYY-MM-DDTHH:mm:SS.ss |
links.$id |
Node ID. | number | - | Example: 1 |
links.method |
Method for consuming the operation. | text | 10 | Examples: GET, POST or PUT. |
links.rel |
Relation for operation consumption. | text | 10 | Example: self |
links.href |
Endpoint for consumption of the operation. | text | 512 | Example: https://cieloecommerce.cielo.com.br/api/public/v2/orders/438f3391860a4bedbae9a868180dda6e |
To query a transaction using Checkout_Cielo_Order_Number, simply perform a GET.
Header:
Authorization:Bearer {access_token}
Parameter in query string
| Parameter | Description | Type | Size | Format |
|---|---|---|---|---|
Checkout_Cielo_Order_Number |
Unique identifier generated by Checkout Cielo. It is obtained from the content of the transaction completion notification or status change notification. | string | 32 | Example: 1db9226geg8b54e6b2972e9b745b23c4 |
{
    "merchantId": "c89fdfbb-dbe2-4e77-806a-6d75cd397dac",
    "orderNumber": "054f5b509f7149d6aec3b4023a6a2957",
    "softDescriptor": "Pedido1234",
    "cart": {
        "items": [
            {
                "name": "Pedido ABC",
                "description": "50 canetas - R$30,00 | 10 cadernos - R$50,00 | 10 Borrachas - R$10,00",
                "unitPrice": 9000,
                "quantity": 1,
                "type": "1"
            }
        ]
    },
    "shipping": {
        "type": "FixedAmount",
        "services": [
            {
              "name": "Entrega Rápida",
                "price": 2000
            }
        ],
        "address": {
            "street": "Alameda Xingu",
            "number": "512",
            "complement": "21 andar",
            "district": "Alphaville",
            "city": "Barueri",
            "state": "SP"
        }
    },
    "payment": {
        "status": "Paid",
        "tid": "10127355487AK2C3EOTB",
        "nsu": "149111",
        "authorizationCode": "294551",
        "numberOfPayments": 1,
        "createdDate": "2023-03-02T14:29:43.767",
        "finishedDate": "2023-03-02T14:29:46.117",
        "cardMaskedNumber": "123456******2007",
        "brand": "Visa",
        "type": "creditCard",
        "errorcode": "00",
        "antifraud": {
            "antifraudeResult": 1,
            "description": "Risco Baixo"
        }
    },
    "customer": {
        "identity": "12345678911",
        "fullName": "Nome do comprador",
        "email": "exemplo@email.com.br",
        "phone": "11123456789"
    },
    "links": [
        {
            "method": "GET",
            "rel": "self",
            "href": "https://cieloecommerce.cielo.com.br/api/public/v2/orders/054f5b509f7149d6aec3b4023a6a2957"
        },
        {
            "method": "PUT",
            "rel": "void",
            "href": "https://cieloecommerce.cielo.com.br/api/public/v2/orders/054f5b509f7149d6aec3b4023a6a2957/void"
        }
    ]
}
| PROPERTY | Type | Size | Description | Format |
|---|---|---|---|---|
merchantId |
GUID | 36 | Store Id at Cielo Checkout. | Example: c89fdfbb-dbe2-4e77-806a-6d75cd397dac |
orderNumber |
alphanumeric For reconciliation purposes, the characters allowed are only a-z, A-Z, 0-9. Special characters and blank spaces are not allowed. |
Order number sent by the store. If it is not sent, Checkout Cielo will generate a number, which will be viewed by the consumer. |
Example: 123456 | |
softDescriptor |
text | 13 | Trading name of the store displayed on the shopper’s invoice. No special characters or spaces. | Example: Loja_ABC_1234 |
cart.discount.type |
text | 10 | Type of discount applied. | Possible values: Amount or Percent |
cart.discount.value |
number | 18 | Value or percentage of discount applied. | Example: If discount.type is Amount, then 1000 = R$10.00. If discount.type is Percent, the value is between 0 and 100. |
cart.items.name |
text | 128 | Name of item in cart. | Example: Order ABC |
cart.items.sku |
text | 32 | Product identifier. | Will exist if provided, e.g. abc123456789 |
cart.items.weight |
number | 10 | Product weight. | Will exist if provided, e.g. 2 |
cart.items.description |
text | 256 | Description of the item in the cart. | Example: 50 pens - R$30.00 |
cart.items.unitPrice |
number | 18 | Unit price of the product in cents | Example: R$1.00 = 100 |
cart.items.quantity |
number | 9 | Quantity of the item in the cart. | Example: 1 |
cart.items.type |
text | 255 | Type of item in cart | AssetDigitalServicePayment |
shipping.type |
number | 36 | Shipping method. | Example: 1 |
shipping.services.name |
text | 128 | Shipping method. | Example: Main House |
shipping.services.price |
number | 10 | Value of the shipping service, in cents. | Example: R$10.00 = 1000 |
shipping.services.deadline |
number | 10 | Delivery time for order in days | Example: 10 |
shipping.services.carrier |
number | 1 | Delivery type code, follows the Shipping_Type table | Example: 1 |
shipping.address.street |
text | 256 | Delivery address. | Example: Rua João da Silva |
shipping.address.number |
number | 8 | Shipping address number. | Example: 123 |
shipping.address.complement |
text | 64 | Delivery address complement. | Example: Home |
shipping.address.district |
text | 64 | Shipping address neighborhood. | Example: Alphaville |
shipping.address.city |
text | 64 | City of delivery address. | Example: São Paulo |
shipping.address.state |
text | 2 | Shipping address state. | Example: SP |
Payment.status |
text | 10 | Transaction status | Example: Paid Full List |
Payment.tid |
text | 32 | TID Cielo generated at the time of authorization of the transaction. | Example: 10127355487AK2C3EOTB |
Payment.nsu |
text | 6 | NSU Cielo generated at the time of authorization of the transaction. | Example: 123456 |
Payment.authorizationCode |
text | 3 | Authorization code. | Example: 456789 |
Payment.numberOfPayments |
number | 6 | Number of Installments. | Example: 123456 |
Payment.createdDate |
text | 22 | Transaction creation date. | Example: YYYY-MM-DDTHH:mm:SS.ss |
Payment.finishedDate |
text | 22 | Transaction completion date. | Example: YYYY-MM-DDTHH:mm:SS.ss |
Payment.cardMaskedNumber |
text | 19 | Masked card number. | Example: 123456**2007 |
Payment.brand |
text | 10 | Card brand. | Example: Visa. See the full list. |
Payment.antifraud.antifraudeResult |
number | 1 | Antifraud status | Example: 1 |
Payment.antifraud.description |
text | 256 | Description of anti-fraud status | Example: Retailer chose not to carry out anti-fraud analysis |
Payment.type |
text | 11 | Type of payment method | Example: CreditCard. See the full list |
Payment.errorcode |
number | 2 | Return code | Example: 00, 51, 57 etc. See the full list |
Customer.Identity |
number | 14 | CPF or CNPJ of the shopper. | Example: 12345678909 |
Customer.FullName |
text | 256 | Full name of shopper. | Example: Fulano da Silva |
Customer.Email |
text | 64 | Shopper’s email. | Example: example@email.com.br |
Customer.Phone |
number | 11 | Phone of the shopper. | Example: 11123456789 |
Capturing consists of confirming an authorization that was previously carried out and is an exclusive procedure for credit card transactions.
The capture takes place after authorization, so that the sale can be completed and the card will be charged. Only after capture will the cardholder be able to view it on their statement or invoice.
To capture a credit card transaction via Checkout_Cielo_Order_Number, simply perform a PUT.
Header: Authorization: Bearer {access_token}
Total Capture
It is the capture of the total value of the transaction.
Partial Capture
It is the capture of part of the transaction value. It can only be performed once.
Note: Partial capture can only be performed once and is exclusive to credit cards.
{
  "success": true,
  "status": 2,
  "returnCode": "6",
  "returnMessage": "Operation Successful",
  "links": [
    {
      "method": "GET",
      "rel": "self",
      "href": "https://cieloecommerce.cielo.com.br/api/public/v2/orders/a9d517d81fb24b98b2d16eae2744be96"
    },
    {
      "method": "PUT",
      "rel": "void",
      "href": "https://cieloecommerce.cielo.com.br/api/public/v2/orders/a9d517d81fb24b98b2d16eae2744be96/void"
    }
  ]
}
| PROPERTY | DESCRIPTION | TYPE | SIZE |
|---|---|---|---|
success |
Sets the status of the capture | boolean | - |
status |
Transaction status at Checkout | int | 2 |
returnCode |
Code explaining the reason for denied or authorized transactions | String | 2 |
returnMessage |
Message explaining the reason for denied or authorized transactions | String | 255 |
To cancel a transaction using Checkout_Cielo_Order_Number, simply perform a PUT.
For cancellation requests for the same transaction, it is necessary to wait a period of 5 seconds between one request and another, so that the balance can be consulted, the amount reserved in the financial calendar and the balance raised, avoiding duplication of cancellation. This rule applies to total and/or partial cancellations.
To identify that cancellation requests are from the same transaction, we consider the EC number, cancellation authorization number, sale date, sale value and NSU.
Important: To make any cancellation request, the establishment must have a sufficient balance in the transaction/book.
Header: Authorization: Bearer {access_token}
Full cancellation
It is the cancellation of the total value of the transaction.
Partial Cancellation
It is the cancellation of part of the transaction value. It can be done more than once, until the total amount is cancelled.
Attention: Partial cancellation can only be carried out after capture. Partial cancellation can be carried out numerous times until the total amount is cancelled.
{
  "success": true,
  "status": 2,
  "returnCode": "6",
  "returnMessage": "Operation Successful",
  "links": [
    {
      "method": "GET",
      "rel": "self",
      "href": "https://cieloecommerce.cielo.com.br/api/public/v2/orders/a9d517d81fb24b98b2d16eae2744be96"
    },
    {
      "method": "PUT",
      "rel": "void",
      "href": "https://cieloecommerce.cielo.com.br/api/public/v2/orders/a9d517d81fb24b98b2d16eae2744be96/void"
    }
  ]
}
| PROPERTY | DESCRIPTION | TYPE | SIZE |
|---|---|---|---|
success |
Sets the status of the cancellation | boolean | - |
status |
Transaction status at Checkout | int | 2 |
returnCode |
Code explaining the reason for denied or authorized transactions | string | 2 |
returnMessage |
Message explaining the reason for denied or authorized transactions | string | 255 |
Checkout has its own status, different from the Cielo website or the Cielo E-commerce API. See the complete list below.
| VALUE | TRANSACTION STATUS | PAYMENT METHODS | DESCRIPTION |
|---|---|---|---|
| 1 | Pending | For all payment methods | Indicates that the payment is still being processed; Note: Boleto - Indicates that the status of the bill has not been changed by the merchant |
| 2 | Paid | For all payment methods | Transaction was captured and money will be deposited into account. |
| 3 | Denied | Only for Credit Card | Transaction not authorized by the person responsible for the payment method |
| 4 | Expired | Credit and Boleto Cards | Transaction is no longer valid for capture - 15 days after authorization |
| 5 | Voided | For credit cards | Transaction was canceled by the merchant |
| 6 | NotFinalized | All payment methods | Payment waiting Status - May indicate an error or processing failure. Contact Cielo Support |
| 7 | Authorized | Credit Card Only | Transaction authorized by the card issuer. It must be captured for the money to be deposited into the account |
| 8 | Chargeback | Only for Credit Card | Transaction canceled by the shopper along with the card issuer. The money will not be deposited into the account. |
Note: For order queries, the
payment.statusfield will be returned in text format, always in English (Transaction Status column).
When a person tries to make a purchase with a card in e-commerce, the transaction may be denied due to a series of factors. The following attempts to complete the transaction using the same card are what we call a retry.
How does it work?
Denied transactions are classified as:
Retries may be charged by the brand and the number of times a transaction can be retried before being charged also varies depending on the brand.
To check the retry rules for each card brand, access the manual Card Brands Retry Program.
The Brazilian Association of Credit Card and Services Companies (ABECS) is responsible for standardizing the return code for denied sales authorizations for both physical and e-commerce payment solutions in the Brazilian market.
To see the complete list of return codes for denied transactions, access ABECS return codes.
Cielo Support
Cielo provides technical support 24 hours a day, 7 days a week in Portuguese and English, at the following contacts: