Access the new E-commerce developers portal at docs.cielo.com.br.
Warning: The content on this page is being discontinued and will not receive updates after 09/04/2024. Please visit the new documentation at docs.cielo.br.
The purpose of this document is to guide the retailer about how to access and use the Cielo Checkout Backoffice
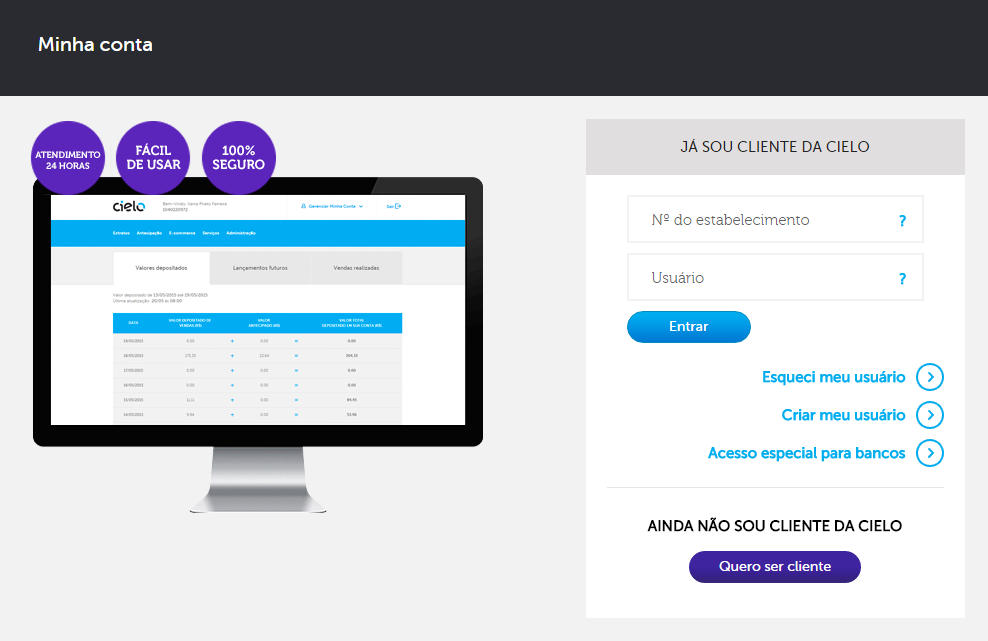
In order to access the Cielo Checkout Backoffice, it Is required that the retailer Log in to the Cielo Website, by inserting his/her Affiliation (establishment number) and User:
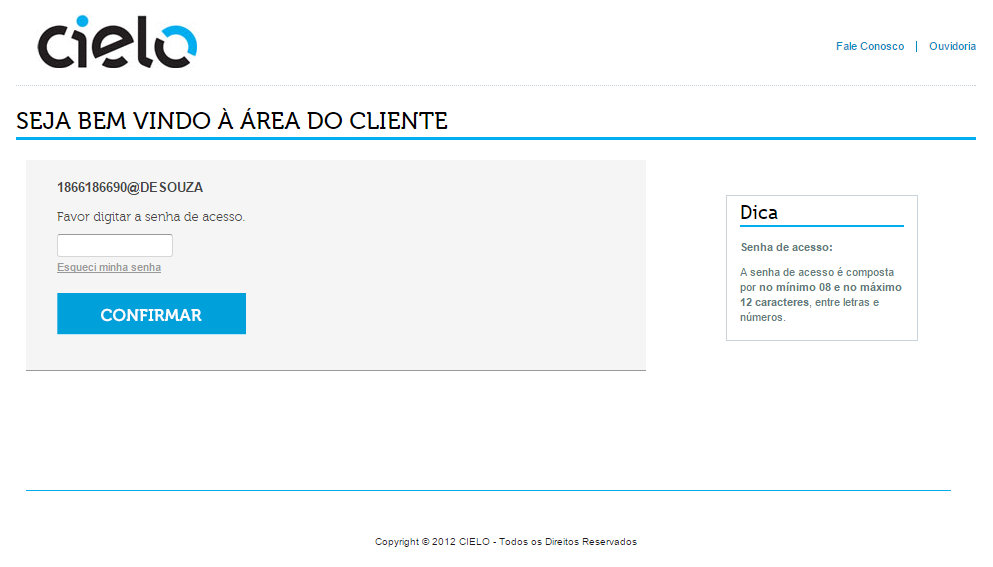
After that, it is required to insert your Password:
On the “Online Sales” area, just click on Cielo Checkout.

In case the main website is not available, just access the URL https://cieloecommerce.cielo.com.br/backoffice and insert your register e-mail and password.
The Backoffice is made of 6 different Cielo Checkout administration Tabs. They are:
| Tab | Description |
|---|---|
| DashBoard | Initial page where the information about your account and about the volume and kind of transactions made in your store are presented. |
| Orders | This page contains the entire listing of transactions made on Checkout Cielo. Here you can search for a particular order or transaction. |
| Payments link | In this page all the Buttons/Links registered on Cielo Checkout are listed |
| Reports | In this page it is possible to generate 05 kinds of reports: “Financial report” “Sales detailed” “Clients list” * “Billing Statement” “Recurrence Report” |
| Manuals | This page contains the Cielo Checkout manuals, as well as the FAQ page and “Questions”, where the retailer is able to contact the Cielo Checkout support team. |
| Configuration | Page where it is possible to make alterations on the Store configurations, its register data and Change your Password. |
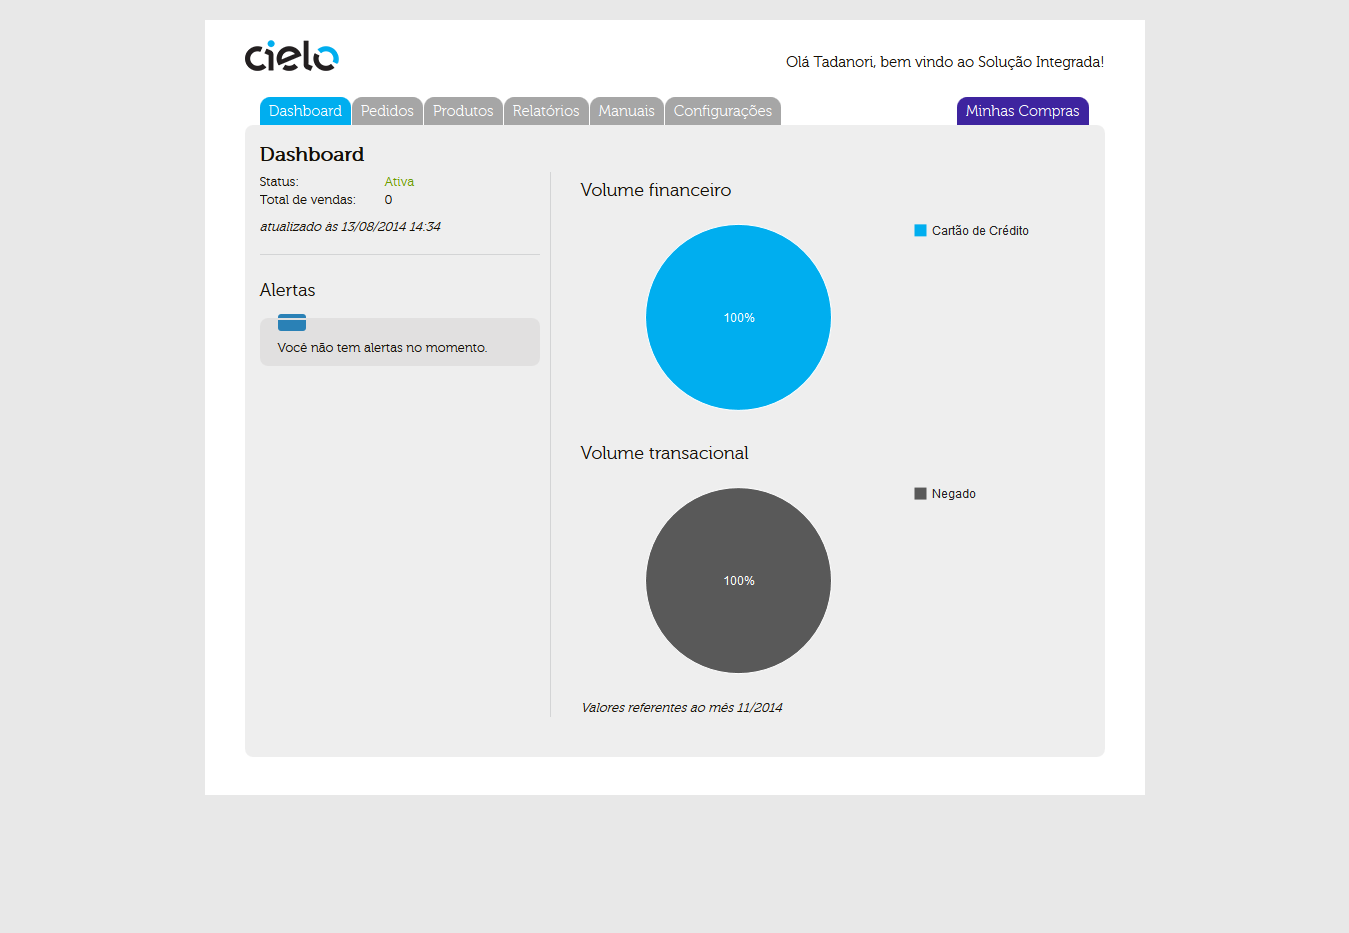
Initial Tab where the information about your account and about the volume and kind of transaction your store has been making via Cielo Checkout.
In this screen, you can find two kinds of information.
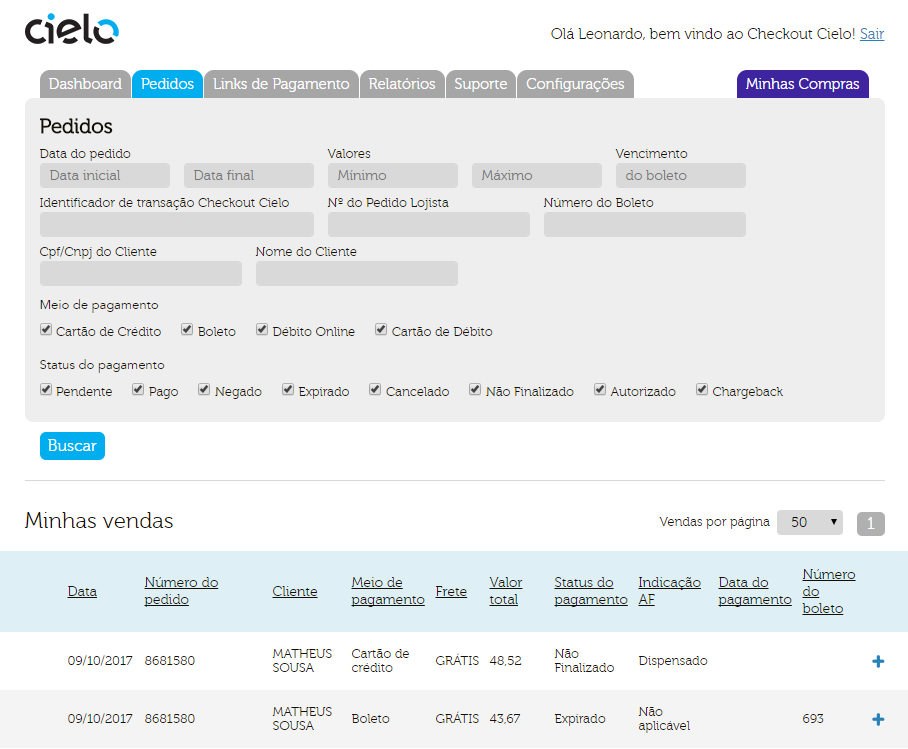
This tab contains the entire listing of transactions made on Cielo Checkout. Here it is possible to search a given order, through a given search parameter on the fields or unchecking the “Payment methods” or “Payment status” “checkboxes” and pressing the button “Search”. The research result is displayed in the form of a transaction listing that can be exported as an Excel spreadsheet.
Orders Listing
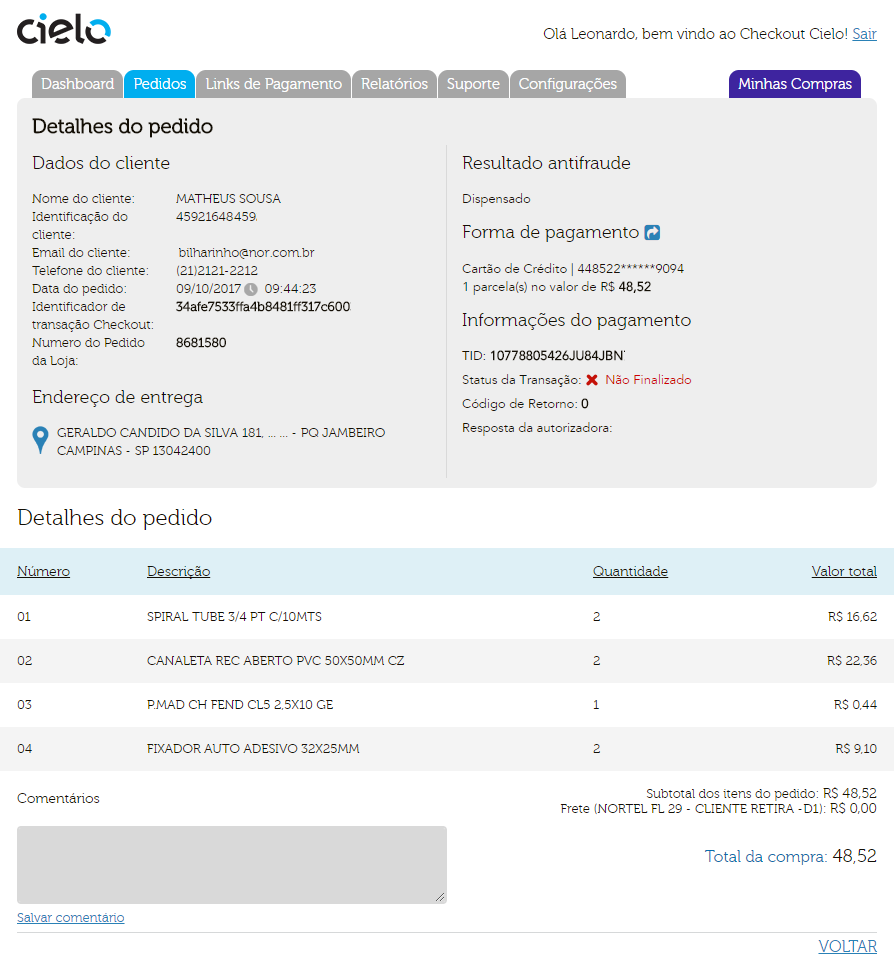
Orders details
In this tab, all links of created payments are presented. These links can be used in different ways to provide a greater sales volume.
To know more about payment links, check::
On the Payments Link menu, there are the areas: Register Payment Link e Listar Links de Pagamento Registrados.
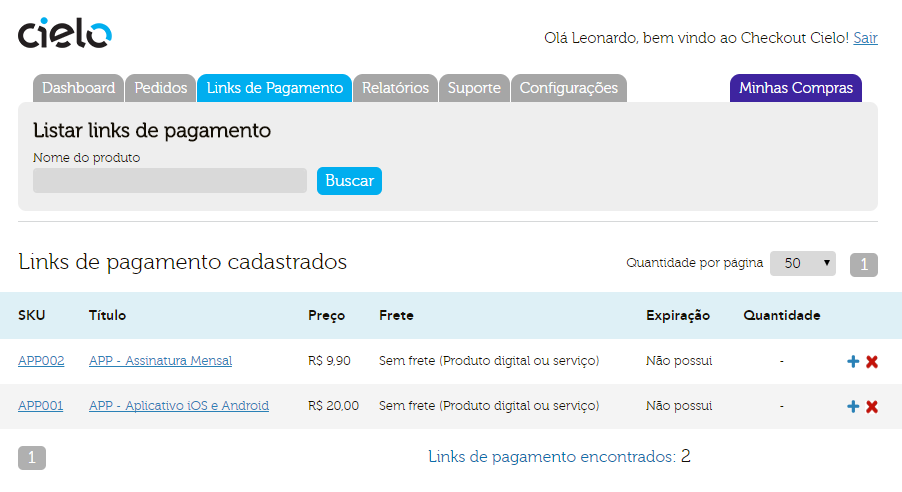
By clicking on the Title or product SKU, you’ll be redirected to page of Product informations, where all the product characteristics are informed and where you can set a standard to the Button (in case your integration is based on Cielo Checkout Button) to be used in the sale of the product.
The integration via Button is better explained on the item Integration via Button/Payments link.
In this page it is possible to register your products based on the kind of product itself. Each registered product will generate different payment Links. Cielo Checkout considers 5 kinds of products: Physical material, Digital, Service, Recurrence and Payments.
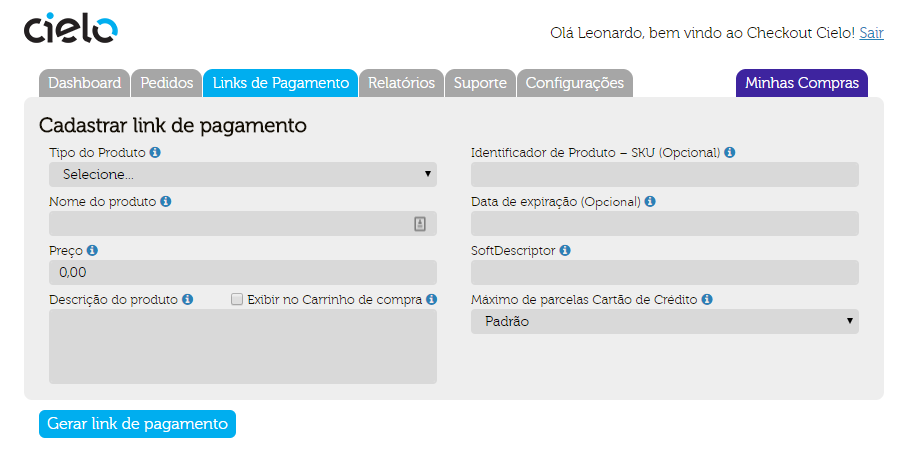
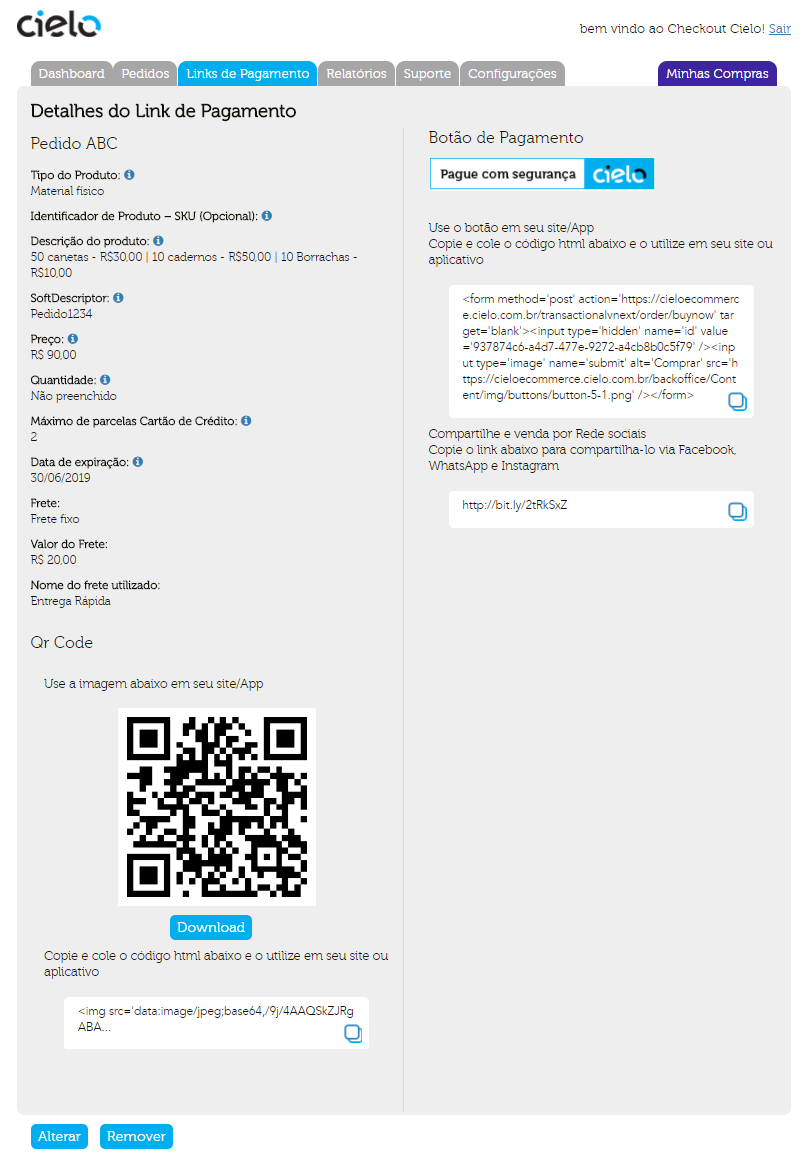
After registering the product/Payment link, the following store will be displayed:
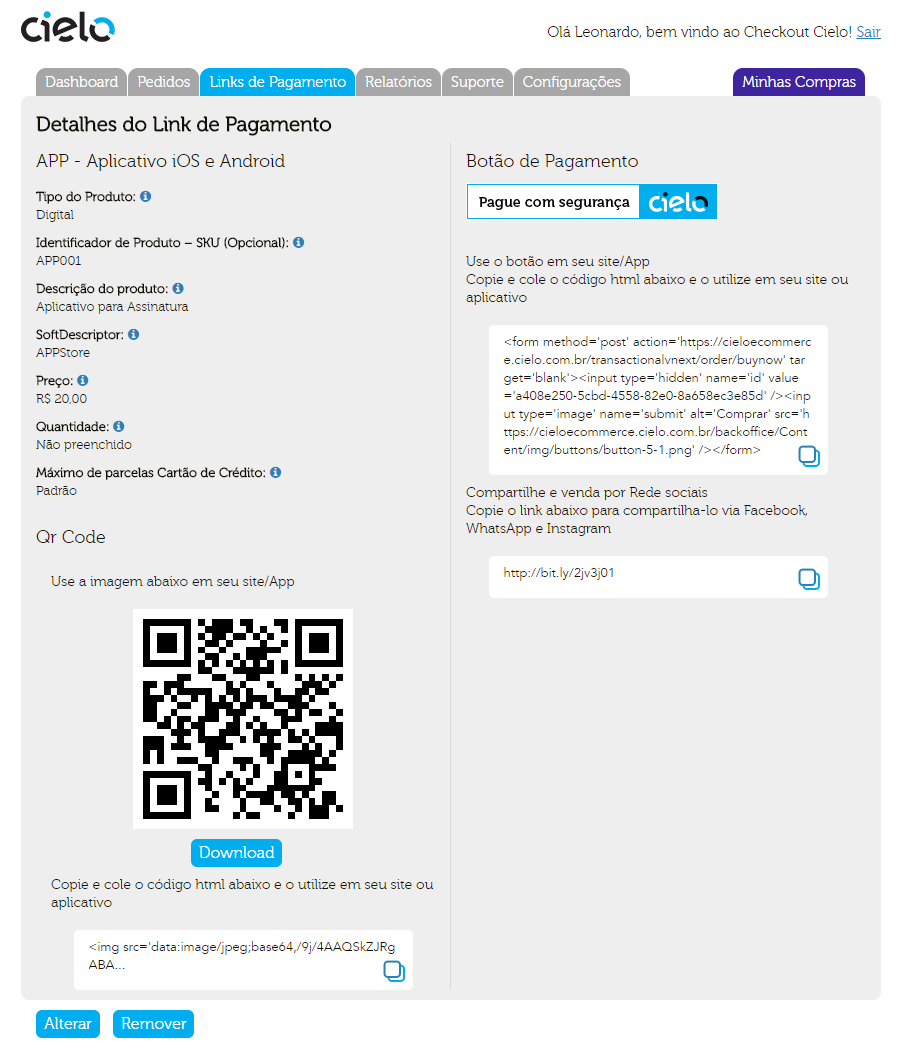
The payment Link is displayed in 3 ways:
<form
  method="post"
  action="https://cieloecommerce.cielo.com.br/transactional/Checkout/BuyNow"
  target="blank"
>
  <input
    type="hidden"
    name="id"
    value="00000000-0000-0000-000000000000"
  /><input
    type="image"
    name="submit"
    alt="Comprar"
    src="https://cieloecommerce.cielo.com.br /BackOffice/Content/images/botao_comprar_3.jpg"
  />
</form>
Example of a Functional button:
| QR Code | Link |
|---|---|
http://bit.ly/2tRkSxZ |
In this page it is possible to generate 05 kinds of reports: “Financial Report”, “Detailed of sales”, “Clients Listing”, “Billing Statement” e “Recurrence Report”.
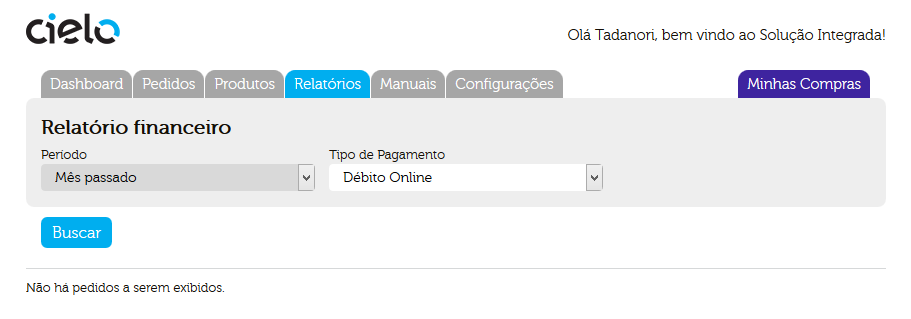
This report presents the sales paid in given period of time, being sorted by payment method. By selectimg the period and payment method, after pressing “Search”, the result will be presented.
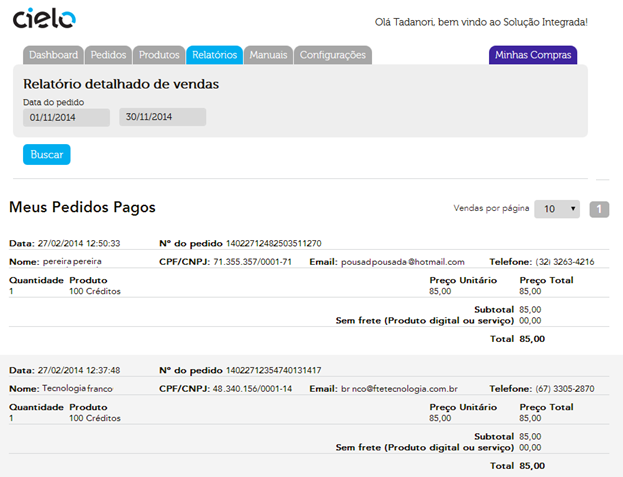
This report informs the value of each order as well as the data about the product and buyer. The report only informs data from the orders considered with “PAID” status.
The clients listing generates an Excel file containing the data of the clients that made the buying in your store.
| Buyer data | Shipping data or Billing |
|---|---|
| Name | Address |
| Number | |
| Phone | Complement |
| CPF/CNPJ | District |
| City | |
| State | |
| Zip Code |
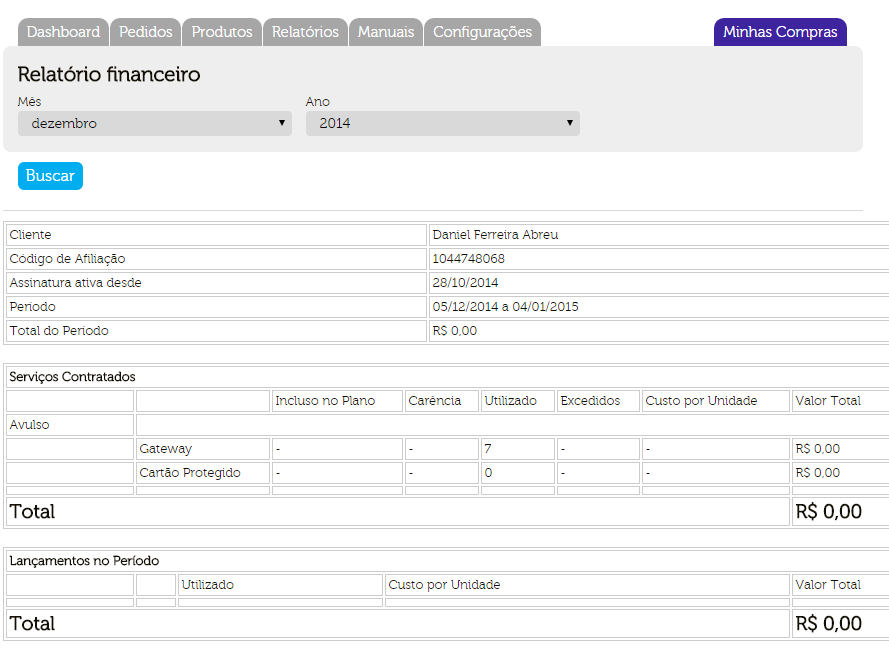
The list of the value charged by the services provided by Cielo is presented in this report. All plans data and transaction costs will be presented here:
In this report it is possible to search the recurrence set and your transactions based on your ID or by Status and occurrence Interval.
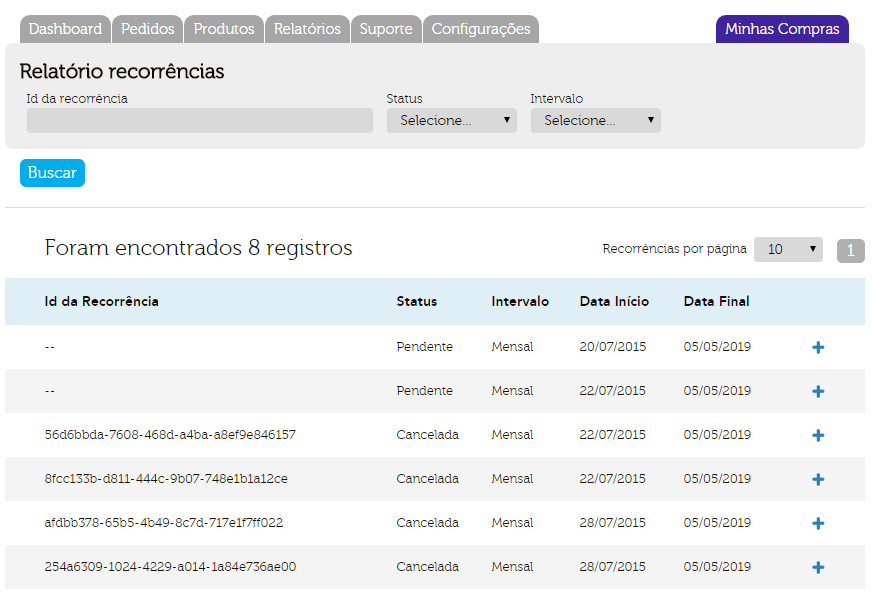
When clicking on the “+” icon, the Recurrence Details screen is opened:
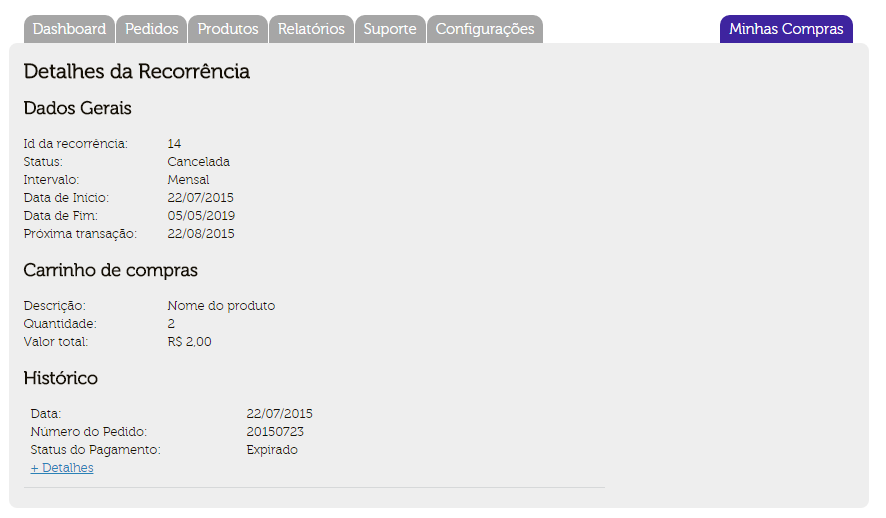
The recurrence details inform the cart and the scheduled transactions history. When clicking on “+Details” the retailer is directed to the Orders details screen (Check item “ORDERS”)
It is possible to perform 3 kinds of modifications on the recurrence:
This page contains the Cielo Checkout manuals, as well as the FAQ page and “Questions”, where the retailer is able to get in touch with the Cielo Checkout support team.
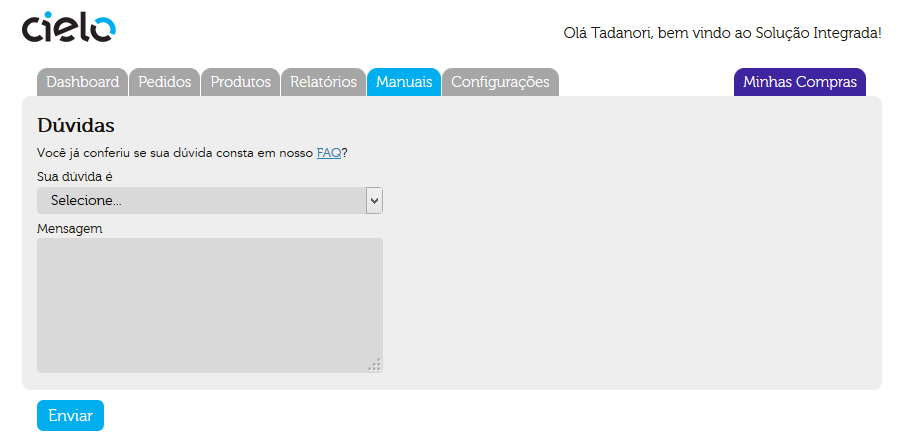
In this page it is possible to make contact regarding Operational, technical and Commercial questions and to access the Cielo Checkout technical and support documents.
In this page it is possible to perform configurations in different mechanisms within Cielo Checkout. This area is divided in 4 different parts: Display, Payments, Anti fraud, Correios freight and services.
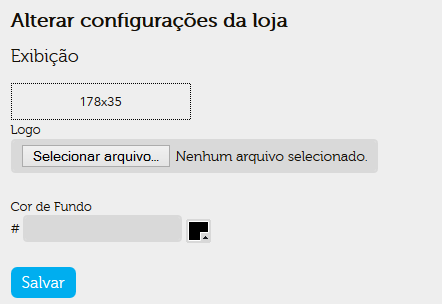
Here it is possible to change the available payment method logo available in your store and website background color through the options box or typing the code related to the selected color (The colors are in RGB standard).
In this screen it is possible to change the available payment methods configurations in your store, setting them as active or not, and to configure the Return URL, notification and Status Change.
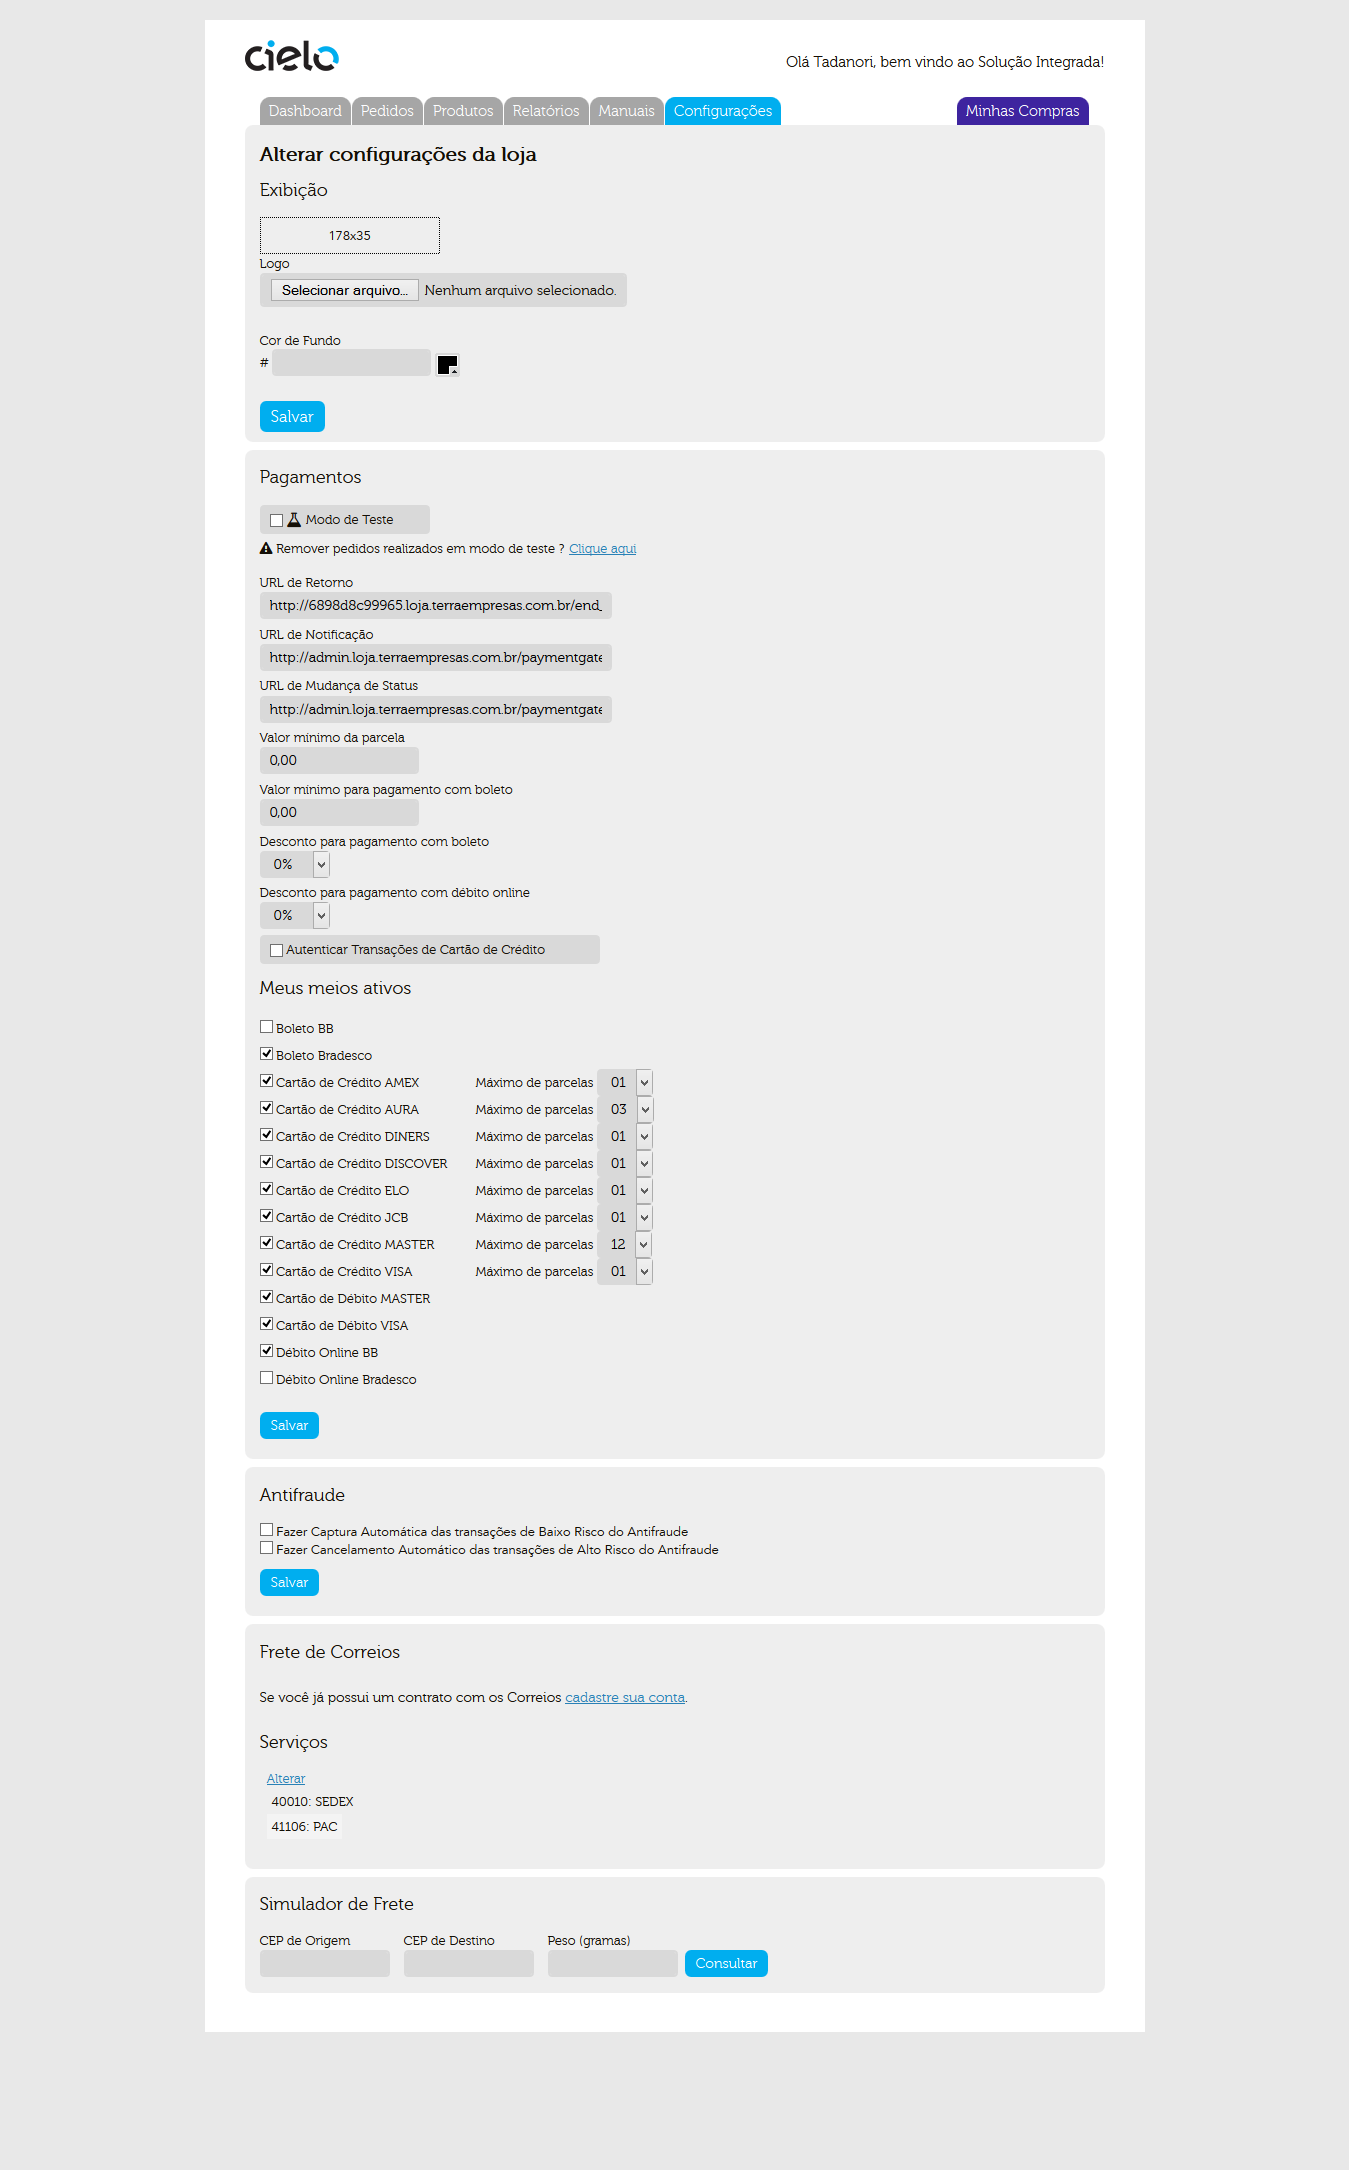
The Cielo Checkout test mode is a tool that allows testing your website’s integration. With the test mode, you can perform transactions as you evolve with the integration and you’re able to simulate scenarios to test different payment methods.
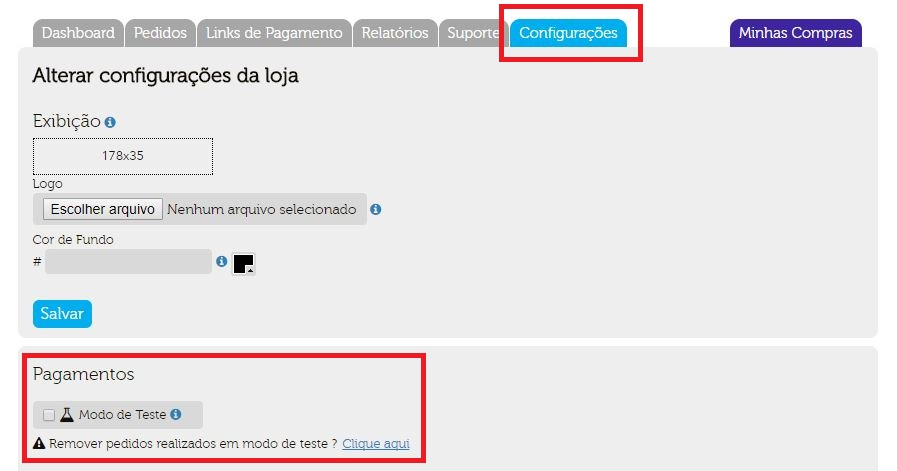
Test mode can be activated by checking the selection box:
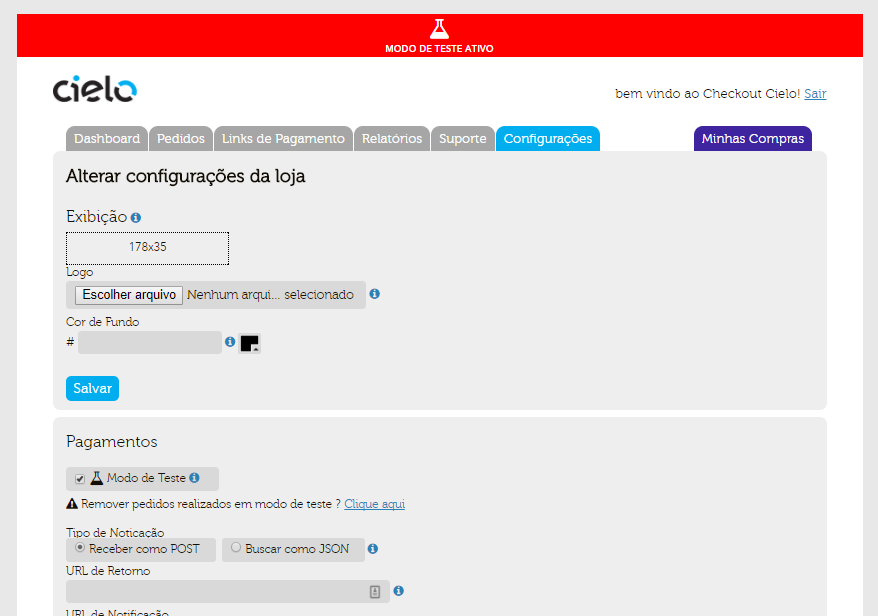
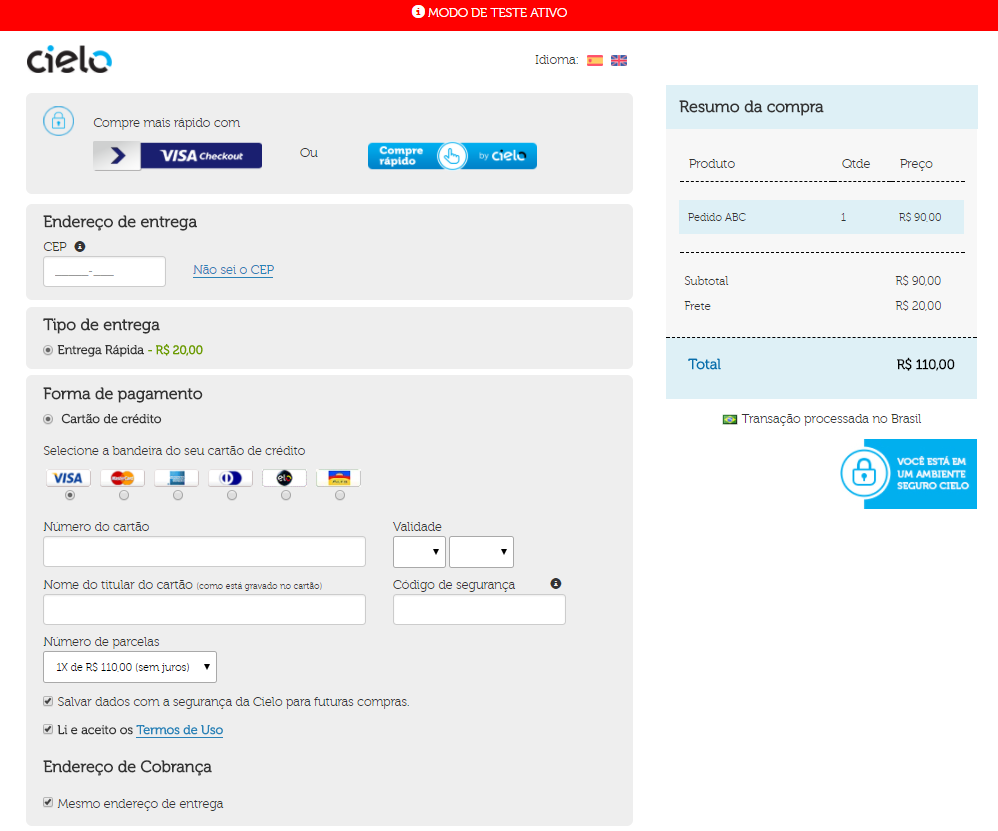
When the option is saved, a red stripe will be displayed on the superior part of the screen. It’ll be displayed in all Backoffice’s screens and on the Cielo Checkout transactional screen.
This stripe indicates that your Cielo Checkout store is now operating in a test environment, that is, the entire performed transaction in this mode will be considered a test.
| Backoffice | Transactional |
|---|---|
 |
 |
Cielo Checkout has two kinds of notifications that the retailer is able to use according to his/her needs:
| Kind | Description | |
|---|---|---|
POST |
Notification where the retailer is passive. Two POST HTTP are triggered, one informing the sale data and the other transaction Status change |
|
JSON |
Notification where the retailer performs a query. A POST containing information to perform a (GET) query on the Checkout transactions |
In order to use both models, the retailer will have to access the Cielo Backoffice and configure both the NOTIFICATION URL and the STATUS CHANGE URL.
For more information about the notifications model, visit the Integration manual
The URLs described in this area of the tab have the function of means of communication between the Checkout and the integrated retailer system. Below there’s description of each of the URLs.
Return URL - When finishing the transaction, the final buyer will be able to be redirected to the return URL. By clicking on the ‘‘BACK’’ button on the sales receipt screen, the buyer will be redirected to the Return URL previously registered on the Backoffice.
Notification URL - When finishing a transaction, it is sent a post with all sale data to the Notification URL, previously registered on the Backoffice. The notification POST is sent only at the moment that the transaction is finished, independent if there was a transaction status change.
Status Change URL - When an order has its status changed, it will be sent a post to the Status Change URL, previously registered on the Backoffice. The POST of status change does not have cart data,only the order identification data.
On the orders screen, within each transaction, there is an option to resend the status change POST. Just click the blue buttons, marked in the image below:
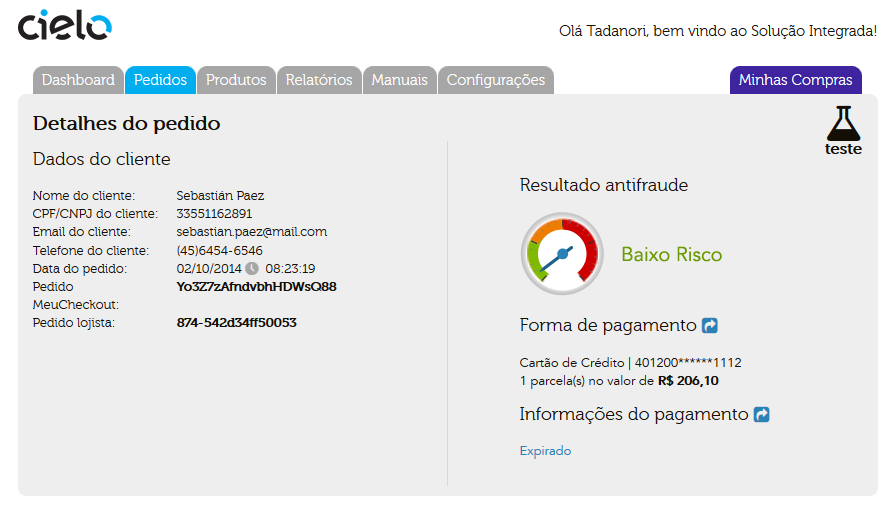
For more information about the Checkout notifications, visit the Integration manual
In this part of the configuration tab, it is possible to configure 4 minimum values and discounts per payment methods:

| Kind | Description |
|---|---|
| Minimum installment value | In case the value of the purchase installment is less than the minimum, Checkout will only display the installment higher than the minimum Example: A minimum installment of R$5,00, in a R$10,00 purchase, it won’t be displayed the 3x installment option, only 2x. |
| Minimum payment value for boleto | Minimum value for the boleto option to be displayed |
| Discount for payment using boleto | Sets a % value for discount in case the Boleto is the payment method selected. |
| Discount for online debit payment | Sets a % for discount in case Online Debit is the payment method selected |
About Minimum Value:
Example: In case the minimum installment value is R$10,00, a purchase of R$100,00 can be split in up to 10x, even if in the store configuration the 12x installment is enabled.
Just check the selection box of the card that you want to make available at the moment of the payment. To disable it, just uncheck the selection box.

The installment is defined by card brand. The maximum number of installments available for each card is set by the retailer.
Cielo Checkout allows installment in up to 12 times without interest. The number of installments displayed on the transactional depends on the minimum installment value configured by the store.
Here it is possible to set the automation of the capture processes and orders cancelling based on the anti fraud analysis result and to set a minimum start value that a transaction must be analysed.

AF analysis minimum value field:

| Anti fraud status | Substatus | Description |
|---|---|---|
| Low Risk | Low Risk | Low risk of being a fraudulent transaction |
| Medium Risk | Medium Risk | Medium risk of being a fraudulent transaction |
| Not finalized | Not finalized | It was not possible to finalize the query |
| N/A | Authenticated | Transactions authenticated by the bank |
| N/A | AF Not hired | Anti fraud not enabled on the retailer’s plan |
| N/A | AF Dispensed | Anti fraud dispensed via contract or inferior to the minimum parameterized anti fraud value on the retailer back office |
| N/A | Not appliable | Not analyzable payment methods such as debit card, boleto and online debit. |
| N/A | Recurrence transaction | Credit transaction be posterior to the scheduling transaction |
| N/A | Transaction declined | Credit sale was declined |
You can view the anti-fraud status by going to the purchase detail in the Orders tab and clicking the (+) icon.
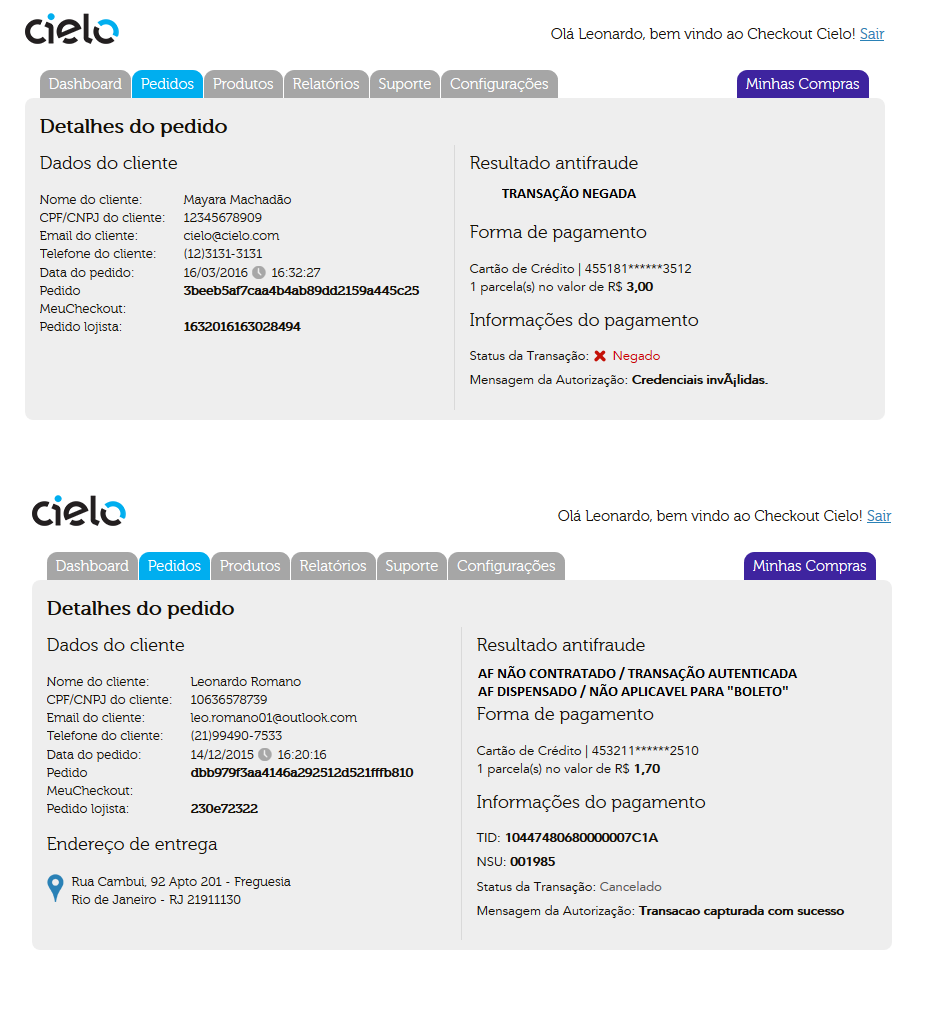
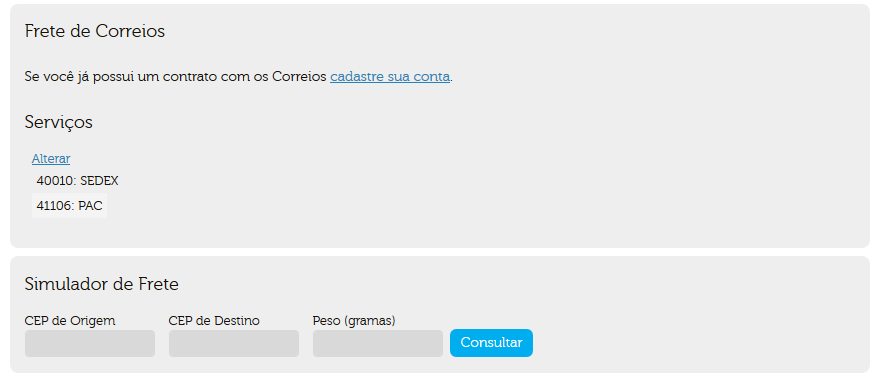
In this area you can configure the available freight options in your Store. On the Information section about Freight, there’s an explanation more detailed about the kinds of available freights on the Cielo Checkout. There’s also on the Correios freight area, a freight calculator for queries (this calculator displays the freight value of each kind of freight registered for a given weight and locality)
The Button, QR CODE or LINK is a purchase method always used when there is no “shopping cart” in your store. This kind of integration is is performed via the register of a set of items to be sold on the Cielo Checkout backoffice.
The button generates one of the 3 different kinds of access methods to the same transactional screen:
| Method | Name | Description |
|---|---|---|
 |
Button | It is an HTML code that when pasted on a website, will direct the buyer to the transactional screen - Ideal to hotSites or E-mail Marketing usage |
 |
QRCODE | Código interpretável por Smartphones e Tablets - Ideal to Printed Marketing or Digital usage |
http://bit.ly/2tRkSxZ |
LINK | a compatible link, ideal to Social Media or Mobile Messengers usage |
This integration model is used to:
In order to use this feature, it is required to register the product that you want to sell, its informations, and after that, simply copy the source code generated to this button.
Each button has an unique code that only allows buying that given product on the price conditions and registered freight. Therefore,a fraudster is not able to change any of these informations when submitting the purchase, because Cielo Checkout will search for every product data on the Cielo Checkout Backoffice register.
| Characteristic | Explanation |
|---|---|
| Specific | Each generated button works only for a given product or group of products. The quantity and volume of produts sold is set on the Button register, not being possible to change the quantity on the transactional screen Example: It will be required to create a button to sell 1 shirt. If the buyer wants two t-shirts, he’ll have use the button 2X or the retailer will have to create a button with 2 t-shirts. |
| Checkout Order Number | The button does not allow the Retailer order number register. As Cielo will be the one responsible to activate the own Checkout, it will be generated an order number (a GUID) unique. The retailer will get this order number as a link to the sale performed. |
| Orders creation | A button generates several independent orders, that is, to limit the number of requests generated by a button, QRCODE or created Link, it is required to set a minimum amount of items in “stock” at the moment of registration. The Button is a method of calls to the Checkout API. Each time it is triggered, a new requisition is made to the API, thus creating a new order |
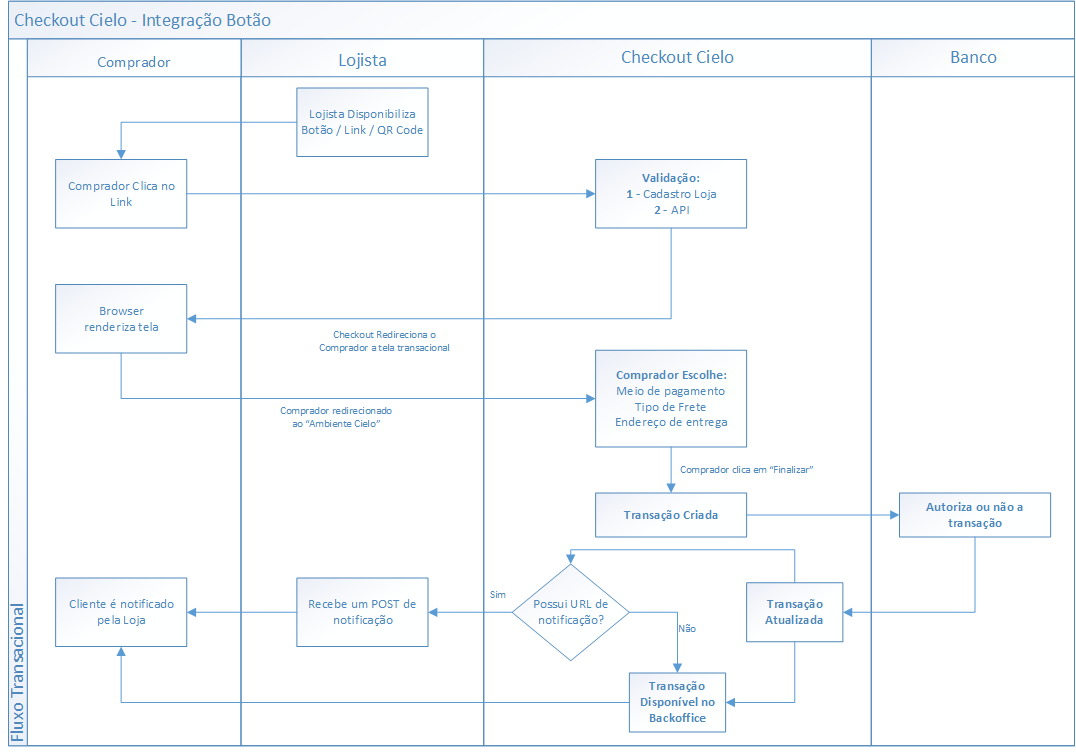
To use this feature, it is required to register the product that you want to sell, its information, and then simply copy the source code generated to this button. The products inclusion is made within the Cielo Checkout Backoffice, on the Products/Register Products menu.
It is possible to create 5 different kinds of Payment Links:
Register Screen
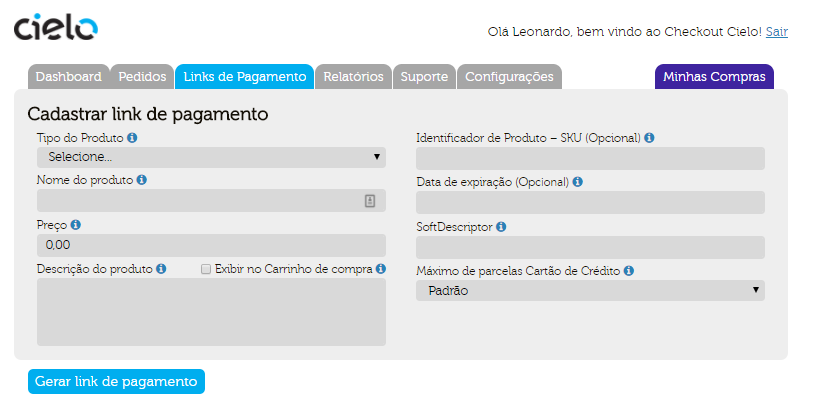
Register Button:
Below the listing of items that must be registered for the button creation:
| Fields | Description | Minimum Size | Maximum Size | Mandatory |
|---|---|---|---|---|
Product Kind |
Indicates if it’s selling a physical material, a service or a digital good. For digital goods, the Freight kind option will no be displayed. | n/a | n/a | Yes |
SKU |
Product identification code | 1 | 50 | No |
Title |
Product title | 1 | 50 | Yes |
Description |
Product Description | 1 | 255 | Yes |
Price |
Total order value in cents (example: R$1,00 =100). | 11 | 14 | Yes |
Freight |
Choose between one of the Freight options (Correios*, Withdraw at the store, Free). | n/a | n/a | Yes |
Origin Zip Code |
This field only appears to the Correios* Freight kind, must be filled with the zip code where the merchandise will depart from for freight calculus purpose. | 9 | 9 | Yes |
Weight (kg) |
This field only appears to the Correios* Freight kind, and it must be filled with the product weight in Kg for freight calculus purpose. | n/a | n/a | Yes |
Freight Cost |
This field only appears to the Fix Freight, and should be filled with the cost that the retailer specifies for his products. | n/a | n/a | Yes |
Shipping method |
Esse campo só aparece para Tipo Produto igual a Material Físico e Tipo de Frete igual a Frete Fixo. | n/a | n/a | Yes |
URL |
This field only appears to the Kind of Product like the Digital. | n/a | n/a | Yes |
Amount |
Sets the maximum amount of orders that the Button is able to generate. If not set, the button will be able to generate an infinite number of products. | n/a | n/a | No |
Adding the button to your page, you’ll have to copy the button HTML code created and include it on your website’s HTML, as the example below.
Each button has a unique code that only allows to buy that particular product in the conditions of price and registered freight. Therefore, a fraudster can not change any of this information when submitting to the purchase, because Checkout Cielo will collect all the product data in the register of the Backoffice Cielo Checkout, and will be worth the register data.